
ExponentHR allows you to submit Expense Requests when seeking reimbursement for business expenses.
Note: If you are a Paid Contractor, you can submit an Expense Request. However, only non-taxable and non-moving expense types are eligible.
You
have just returned from a business trip and need to be reimbursed
for your meals and hotel stay while out of town. Use the Expense
Reporting module to create and submit your expense request for
the business trip. |
To create an Expense Request:
1. On the Menu, click Time and Pay > Report ExpensesTime and Pay > Report Expenses.
The Expense ReimbursementsExpense Reimbursements page displays.
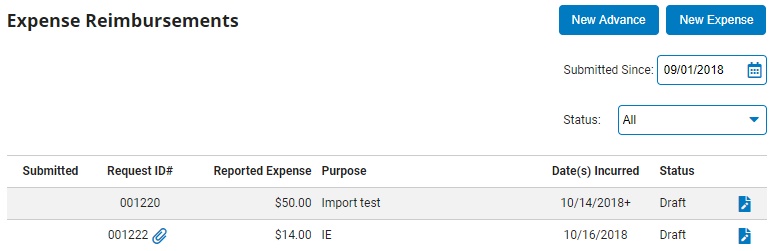
2. Click the New ExpenseNew Expense button.

The Expense RequestExpense Request page displays.
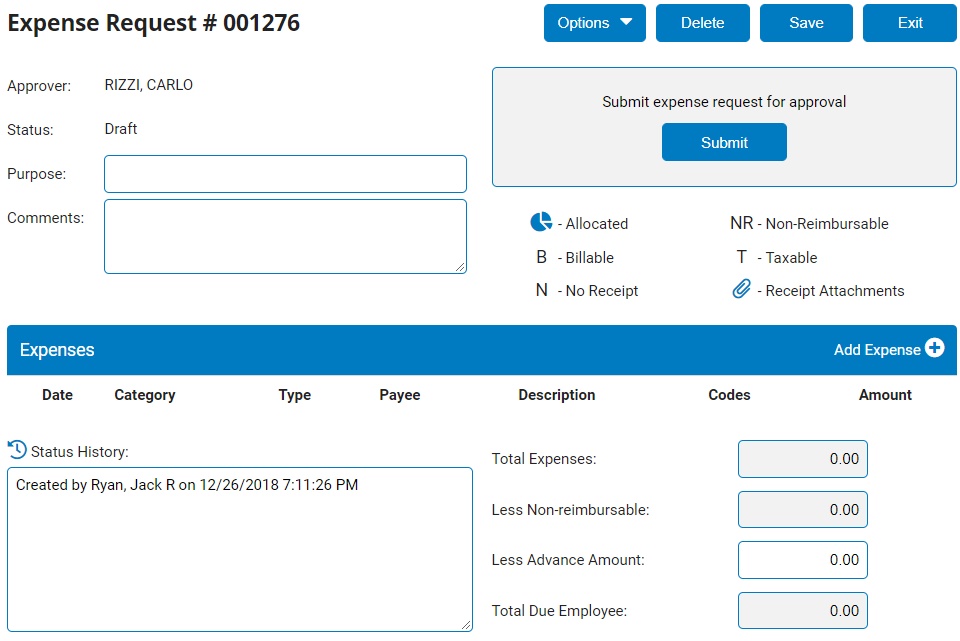
3. Enter the purpose of the expense in the PurposePurpose field.

4. If necessary, enter any additional information about the request in the CommentsComments field.

5. Add expense entries as needed through either available method:
Adding Expenses to the Expense Request Individually
1. Click the Add ExpenseAdd Expense button to add the first expense to the request.
![]()
The Add/Edit ExpenseAdd/Edit Expense page displays.
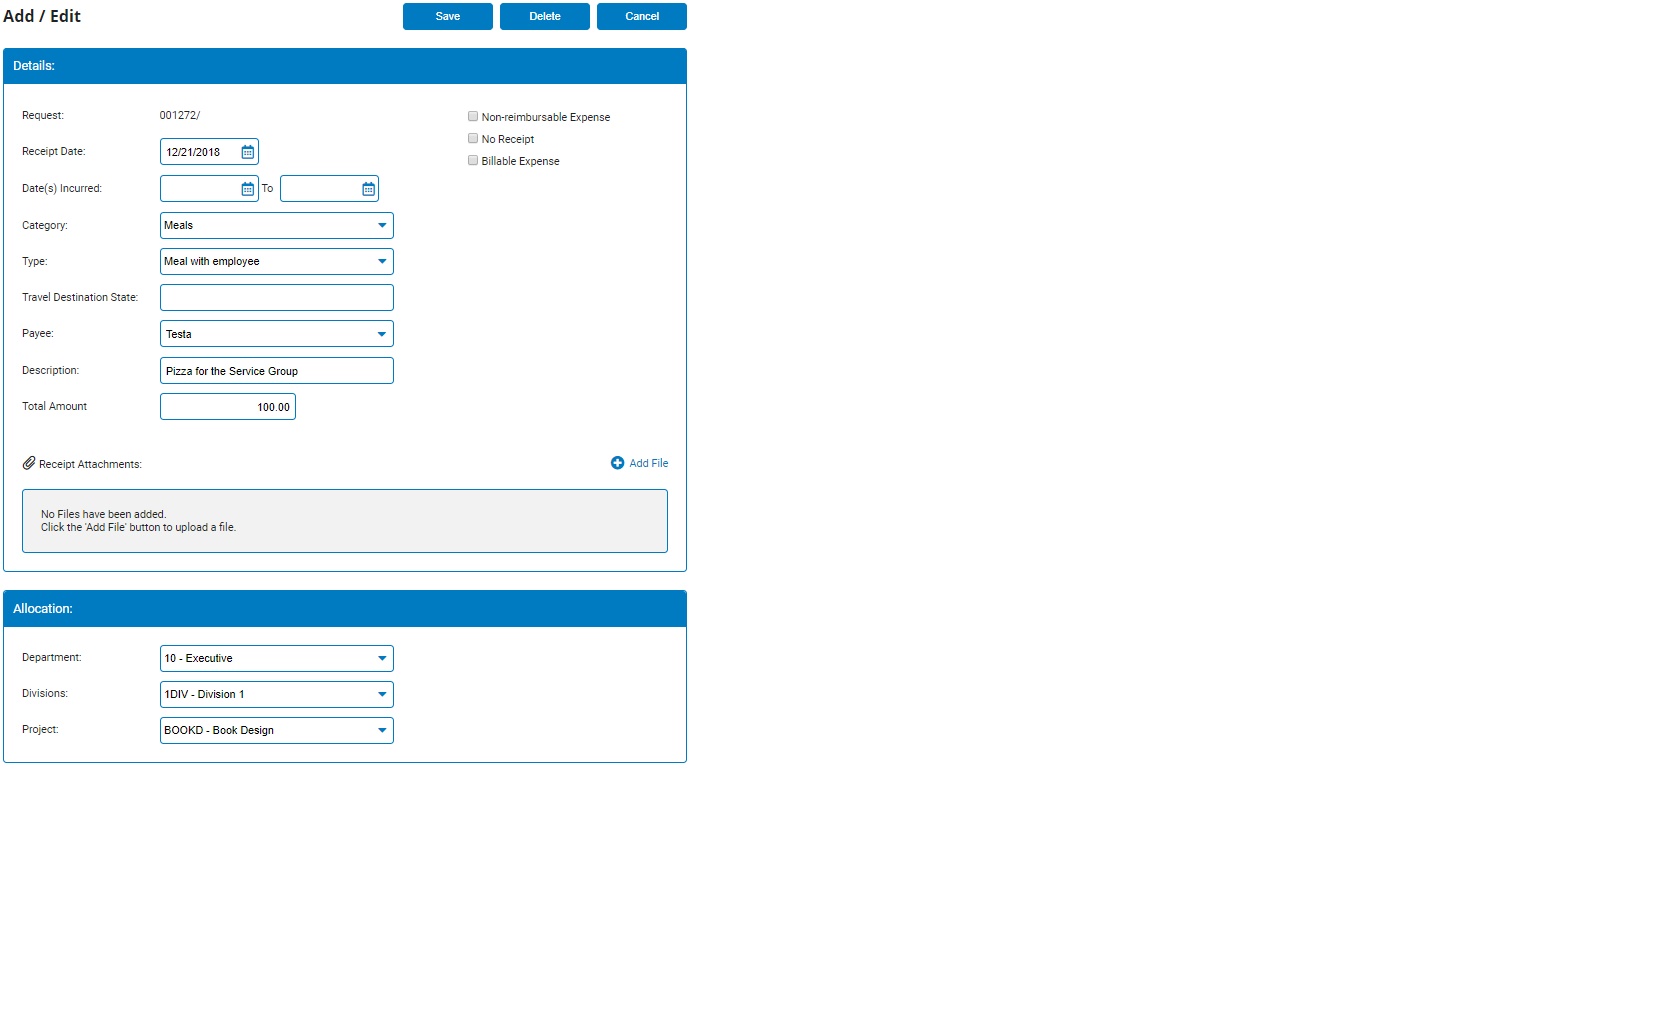
2. Enter the date on the receipt (the date the expense was paid) in the Receipt DateReceipt Date text box (you may also select the date from a calendar by clicking on the CalendarCalendar button).
![]()

Note: The date on the receipt may be different from the date when the employee incurred the expense. For instance, the employee might have stayed three days at a hotel and not paid until the third day. Or, they might have prepaid and not stayed at the hotel until several weeks later. Include the date the employee paid for the expense in the Receipt Date field, regardless of when the expense was actually incurred.
3. If necessary, enter the date the expense was incurred in the Date(s) IncurredDate(s) Incurred text boxes (you may also select the dates from a calendar by clicking on the CalendarCalendar button).
![]()

Note: The date(s) that the employee incurred the expense may be different from the date they paid it. Include the dates the employee incurred the expense (e.g. the days you spent at a hotel), not the date it was paid.
4. Select the category of expense from the CategoryCategory drop-down box.

5. Select the type of expense from the TypeType drop-down box.

6. Enter the state where you are traveling for the expense in the Travel Destination StateTravel Destination State box.

7. Enter the recipient of the expense (e.g. a hotel, rental car chain, or restaurant) in the PayeePayee text box or select an existing payee from the drop-down list. Each unique payee you enter will store in your Payee list automatically after the expense is saved when the expense is saved or submitted.

8. Enter a detailed description of the expense in the DescriptionDescription text box.

9. Enter the total amount of the expense in the Total AmountTotal Amount text box.

10. If the expense has any exceptionsexceptions, check the appropriate ExceptionsExceptions check box.
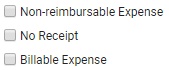
Check the Non-Reimbursable Expense check box if the expense is not an expense your company will reimburse (for example, personal expenses that may be on the receipts but which your company is not associated with).
Check the No Receipt checkbox if you do not have a receipt for the expense.
Check the Billable Expense checkbox
if the expense you are reporting may be billed to another
source (for example, a business trip billed to a client).
This option may not be available for all companies--check
your company policy.
11. To allocate the expense to a cost center, such as a department, division, or project, select the appropriate options from the AllocationAllocation field(s).
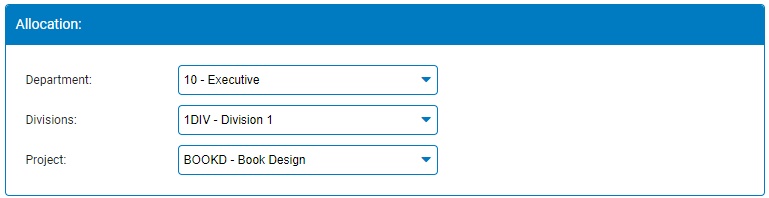
Note: The ability to allocate expenses must be enabled by your HR administrator so the options may not appear.
12. To attach a receipt, click the Add FileAdd File link. Click the Choose FileChoose File button to locate the file, and then click the UploadUpload button.


Notes:
You can attach multiple files in an single expense item.
The file size limit is 5MB.
13. Click the Add AnotherAdd Another button to save the expense and add another one.

The Add/Edit Expense page clears, but the Receipt Date and Payee text boxes stay populated.
14. When you finish entering all expenses, click the Save and ExitSave and Exit button.

Importing expenses into the Expense RequestImporting expenses into the Expense Request
Importing expenses into the Expense Request
1. Click the Options button > Import DataOptions button > Import Data to add the first expense to the request.
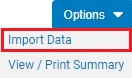
The Import Expense FileImport Expense File page displays.

2. Select the appropriate template from the available options in the TemplateTemplate drop-down box that matches the expense import file that you are wanting to import.

Note: If a template matching your expense import file is not yet available, you may choose to create a new templatecreate a new template or modify an existing templatemodify an existing template.
Modifying an Existing Expense Import Template:
1. Within an Expense Request, click Import FileImport File.

The Import Expense FileImport Expense File page displays.
2. Choose the template in the TemplateTemplate drop-down box that you would like to modify and click the Edit TemplateEdit Template button.


Note: The setup of the existing template will appear where you can make any desired modifications.
3. Click the Actions button > Copy TemplateActions button > Copy Template to make modifications to a duplicate of the selected template without making any changes to the original template.
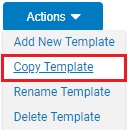
4. Once satisfied with the changes made, click the ExitExit button.

Result: The Expense Import template is saved. You can now use it to import expense reimbursement requests from the source file.
Creating a New Expense Import Template:
1. Within an Expense Request, click the Options button > Import DataOptions button > Import Data.
The Import Expense FileImport Expense File page displays.
2. Click the Edit TemplateEdit Template button.

3. Click the Actions button > Add New TemplateActions button > Add New Template on and then type a name for the new template in the Template Name (New) text box.
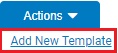
The Expense Import Template SetupExpense Import Template Setup page displays.
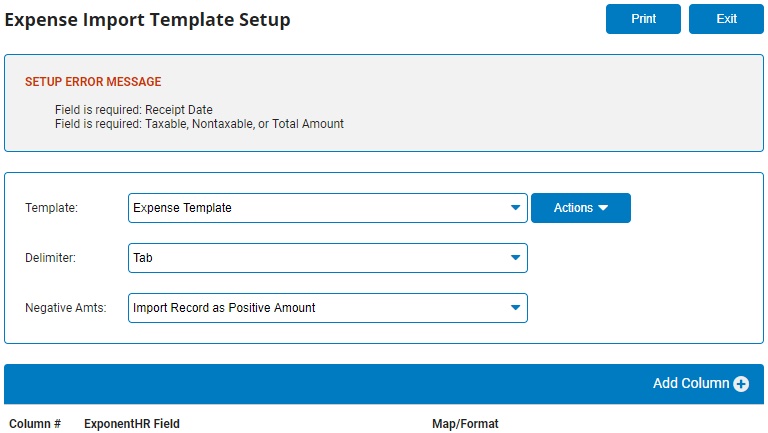
Note: You will receive a setup error message until you enter the required information (marked with a red asterisk).
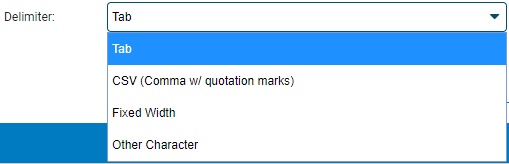
4. Choose the appropriate file type in the DelimiterDelimiter drop-down box that matches your expense file.
5. Choose if Negative AmtsNegative Amts present on the expense statement should be imported as a positive (+) amount or ignored (not imported. Default is for any negative amounts to be imported as positive amounts in the expense reimbursement request.

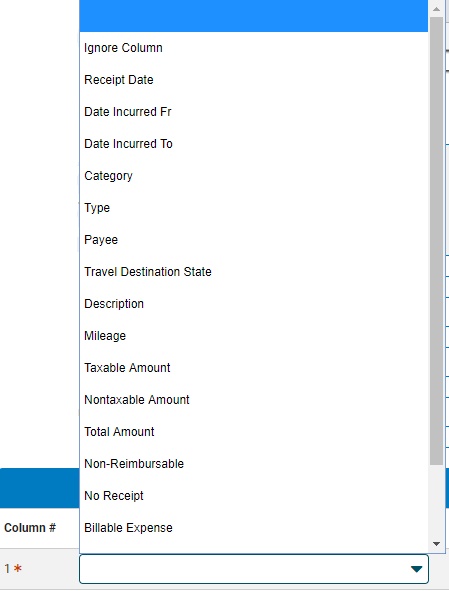
6. Click the Add ColumnAdd Column button to insert a new column into the template that matches the expense import file.

A new row appears with a drop-down box with the available ExponentHR FieldExponentHR Field options to use for the new column.
7. If the column has associated codes that can be differentiated based on the text on the expense import statement, you may choose to map the codes to assist with the population of the expense request.
How to Map the Codes:
1. Click the Map ValuesMap Values button.

The Map Column ValuesMap Column Values page displays.
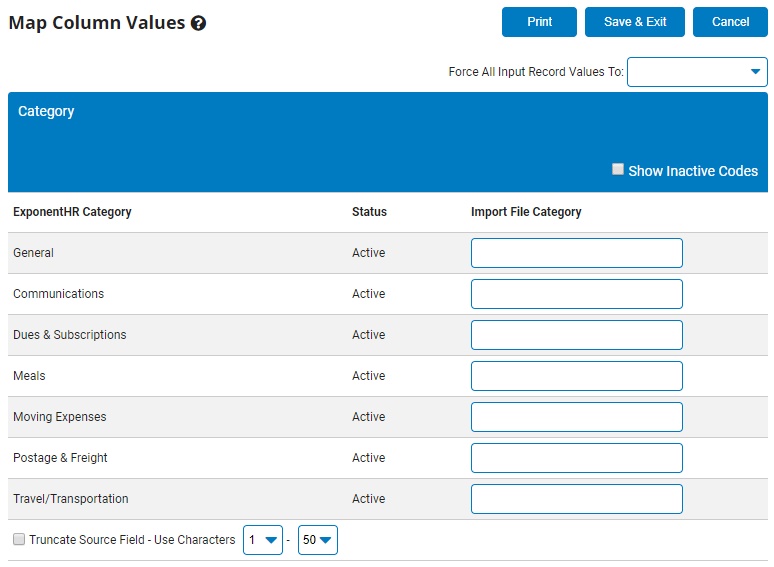
2. For each ExponentHR code, type the matching code from the import file. (For example, for the ExponentHR Location Code Dallas, your source file might have it as DFW.)
3. If the same value should be imported for each record, you can choose to force that value into the field by choosing the desired record in the Force All Input Record Values To:Force All Input Record Values To: drop-down box.

4. If only part of a value on the expense statement should be used for the mapping, you can choose to truncatetruncate the value and designate which characters to pull from the expense statement.

Note: The value being imported can be up to 50 characters in length.
5. Click Save & ExitSave & Exit when satisfied with mapping selections.

8. Click the Exit button.
Result: The Expense Import template is saved. You can now use it to import expense reimbursement requests from the source file.
3. Click the Import FileImport File button.
4. Click the Choose FileChoose File button and locate the expense statement you want to import.
5. Click the Upload FileUpload File button once the desired file is selected.

The Expense Import ReviewExpense Import Review page displays.

When reviewing the expense items, ExponentHR marks any imported items that contain an informational noteinformational note, a warning messagewarning message, or a critical errorcritical error that may require your attention.
![]() Critical Error:
Signifies an invalid value that will prevent the expense item
or field from being imported.
Critical Error:
Signifies an invalid value that will prevent the expense item
or field from being imported.
Examples:
Invalid Receipt Date: The expense line item will not be available to import
Invalid Amount: The expense amounted will default to zero (0)
Invalid Category/Type: The field will not import unless item is mapped within template
Invalid Mileage Type/Rate: The field will not import unless item is mapped within template
Negative Amount Ignored (per template setup)
![]() Warning: Signifies an invalid value
that will not be imported.
Warning: Signifies an invalid value
that will not be imported.
Examples:
Invalid Value: The field will not be imported for the expense item due to improper mapping
Value exceeds the maximum character length (first 100 characters will be imported)
Negative Amount Converted to Positive Amount (per template setup)
![]() Information: Signifies
items that will be imported, but may require action.
Information: Signifies
items that will be imported, but may require action.
Examples:
Field is Empty: Field on file was blank and nothing for that field value will be imported
New Payee: Payee imported from file is not in ExponentHR yet, but will now be added as an option
Mileage Rate Equals Zero (0)
6. Validate the expenses to be uploaded into the Expense Reimbursement Request by checking check box next to each desired expense.
7. Once all desired expenses have been checked, click the ImportImport button. If changes need to be made, click the ExitExit button and make the desired adjustments to the file or template.

Note: Clicking Import will upload the selected expense items into the Expense Reimbursement Request. Any items with incomplete imports will appear in red and cannot be approved until all critical errors are removed.
8. Click the EditEdit button to make any adjustments within the request to the expense item(s).
![]()
9. If any expense has an exceptionexception, check the appropriate Exceptions check boxExceptions check box within the expense item.
Check the Non-reimbursable Expense check box if the expense is not an expense your company will reimburse (for example, personal expenses that may be on the receipts but which your company is not associated with).
Check the No Receipt check box if you do not have a receipt for the expense.
Check the Billable Expense check
box if the expense you are reporting may be billed to
another source (for example, a business trip billed to
a client). This option may not be available for all companies
- check your company policy.
10. To allocate the expense to a cost center, such as a department or location, select the appropriate options from the AllocationAllocation field(s).
Note: The ability to allocate expenses must be enabled by your HR Administrator so the options may not appear.
11. To attach a receipt, click the Add FileAdd File button. Click the Choose FileChoose File button to locate the file, and then click the UploadUpload button.
Notes:
You can attach multiple files in an single expense item.
The file size limit is 5MB per file.
12. Click the Add AnotherAdd Another button to save the expense and add another one.
The Add/Edit Expense page clears, but the Receipt Date stays populated.
13. When you finish entering all expenses, click the Save and ExitSave and Exit button.
6. If you previously received an advance payment that should be applied to offset this expense, enter the amount in the Less AdvanceLess Advance text box.

7. Review associated expenses and then click the Submit button to submit the request to your manager.
A confirmation pop-up displays.
Note: If you are not ready to submit the request, you may click the Save button to save the Expense Request in Draft status without submitting it. You may edit the Expense Request at a later time and submit it when you are ready.
8. Click the Confirm button.
On the confirmation page, you may receive a notice that an expense item did not have an electronic receipt attached. If digital copies of expense receipts are required by your company, click the Cancel button to return to the expense item and attach any available receipts that were previously omitted from the request.
Result: The Expense Request is submitted to your manager for approval. When the request is approved, the status will change to Approved. When your request is posted by Finance/Accounting, the status will change to Posted. When you receive reimbursement, the status will change to Paid.
Note: If electronic copies of the receipts are not required, you may then need to print the request and attached any hard copy receipts before submitting it to your manager. See Related Help Topics below for more information.
Related Help Topics
Printing Expense and Advance Requests