
Managers may need to adjust the leave reported by employees each pay period. The Time Clock Review page allows managers to adjust employee leave as necessary.
To adjust employee reported leave:
1. On the Management Navigation Menu, click Wage & Tax > Time Clock ReviewWage & Tax > Time Clock Review.
2. Select the appropriate pay schedule from the Pay Schedule drop-down list.
The Time Clock ReviewTime Clock Review page displays a current summary of employee reported time for the pay schedule selected.
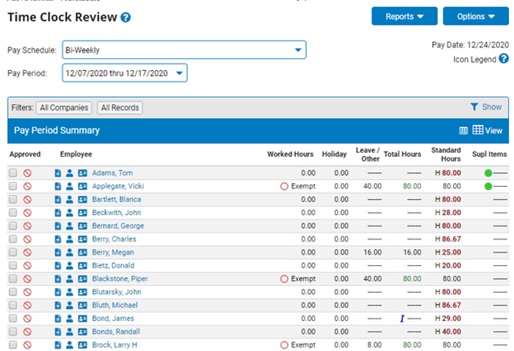
3. If necessary, select the appropriate pay period from the Pay Period drop-down list.
The Time Clock Review page updates.
4. Filter the list of employees as needed.
Filtering EmployeesFiltering Employees
1. Click the FilterFilter icon and select the criteria by which you want to filter the employees.

2. Select the specific value you want in the Filter By drop-down list to change the display of the Time Clock Review screen.
Note: Any selection aside from All Records in the Filter By drop-down list will bring up a second drop-down list to allow you the option to filter by a specific criterion within the filter topic chosen.
3. Check the box next to the one or more Other Filters Options to further control what data is included in the results.
Note: If you choose All for a criterion, the results will be grouped and sub-totaled by that criterion.
4. Check the box next to the one or more Other Show Options to further control what data is displayed in the results.
Note: If an employee’s Calculated Work Hours are not equal to their Actual Worked Hours, the employee's hours will be highlighted;you may mouse-over the highlighted hours to show a hovering link with the employee’s Calculated Worked Hours.
5. Check the Save Filter Values box to have the selected filter options stored and automatically applied when you return to the Time Clock Review page. If the save option is not used, the selected filters will apply to your current session, but the system will revert to the prior filter settings the next time you return to the Time Clock Review.
6. Click the Apply button.
Result: The Time Clock Review page displays the employees meeting the classification filter(s) you selected. The selected filters are also displayed in the filter header bar above the list of employees for easy reference.
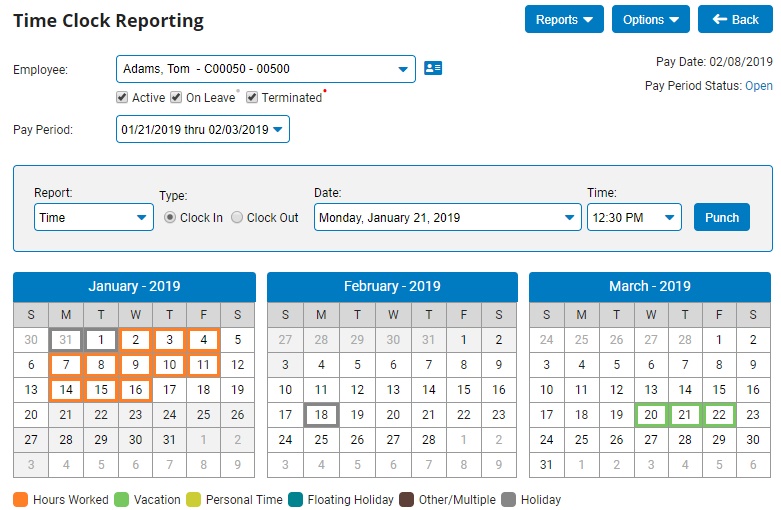
5. Click the employee name link to open the employee's Time Clock detail and edit employee time, as necessary.
The Time Clock ReportingTime Clock Reporting page displays.
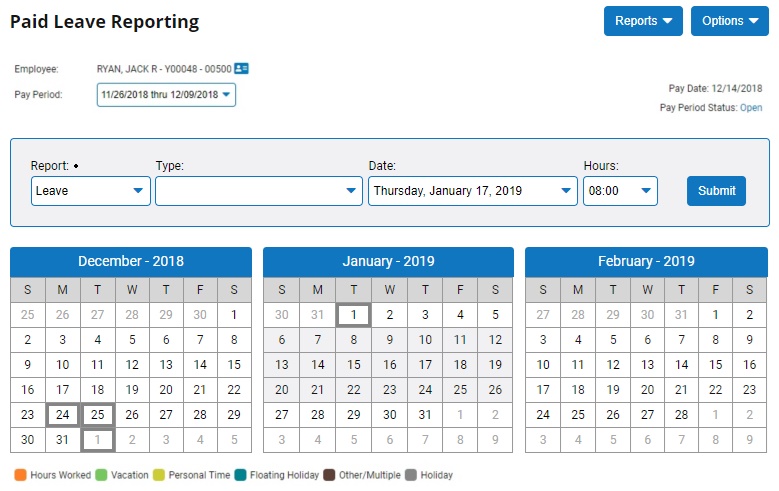
6. Click the employee name link to open the employee's Time Clock detail and edit employee paid leave, as necessary.
The Paid Leave ReportingPaid Leave Reporting page displays.
7. If necessary, adjust display options by clicking the Options button.
Click the Show Calendar link to display a calendar with all pay dates, paid holidays, and other information for the employee.
Click the Show Notes Box link to display a notes text box in which you can enter information pertaining to the employee's time entries.
Click the Show Deleted Records link to display time entries that have previously been deleted.
8. Adjust employee time for the selected pay period as necessary.
9. Adjust employee paid leave for the selected pay period as necessary.
Adding Leave for Exempt EmployeesAdding Leave for Exempt Employees
|
In reviewing the Time Clock Review for your employees, you notice that one of your employees has not reported a sick day that they took off. After speaking to the employee to ensure that they did in fact take the day off, you can add a paid
leave entry by using the Time Clock Review edit features. |
To add leave to an exempt employee's pay period:
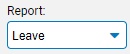
1. Select the Report LeaveReport Leave option from the report type drop-down box.
2. Select the type of paid leave you wish to report from the TypeType drop-down box.

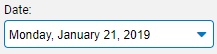
3. Select the day on which the paid leave took place from the DateDate drop-down box.
Note: You may only select days within the selected pay period.
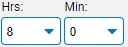
4. Select the amount of paid leave to be applied from the Hours and MinutesHours and Minutes drop-down boxes.
5. If necessary, enter in an hourly rate in the Override RateOverride Rate text box to be used instead of the employee's default hourly rate when processing the adjustment .

6. If necessary, add any additional details about the entry in the Optional NotesOptional Notes text box.

7. Click the Submit button.
Result: The paid leave you just added displays on the Hours Submitted for Selected Period table. The employee will now be compensated for these hours as necessary.
Adding Leave for Non-Exempt EmployeesAdding Leave for Non-Exempt Employees
|
In reviewing the Time Clock Review for your employees, you notice that one of your employees has not reported a sick day that they took off. They have entered 8 hours of regular pay instead of sick time on the day in question. Therefore,
you can correct the entered hours by using the Time Clock Review edit features. |
To add leave to a non-exempt employee's pay period:
1. Select the Report LeaveReport Leave option from the report type drop-down box.
2. Select the type of paid leave you wish to report from the TypeType drop-down box.
3. Select the day on which the paid leave took place from the DateDate drop-down box.
Note: You may only select days within the selected pay period.
4. Select the amount of paid leave to be applied from the Hours and MinutesHours and Minutes drop-down boxes.
5. If necessary, enter in an hourly rate in the Override RateOverride Rate text box to be used instead of the employee's default hourly rate when processing the adjustment.
6. If necessary, add any additional details about the entry in the Optional NotesOptional Notes text box.
7. Click the Submit button.
Result: The paid leave you just added displays on the Hours Submitted for Selected Period table. The employee will now be compensated for these hours as necessary.
Reporting Multi-Day LeaveReporting Multi-Day Leave
To report multiple days of paid leave in an employee's pay period:
1. Click the OptionsOptions button and select Report Multi-Day Leave.

The Report Multi-Day LeaveReport Multi-Day Leave page displays.
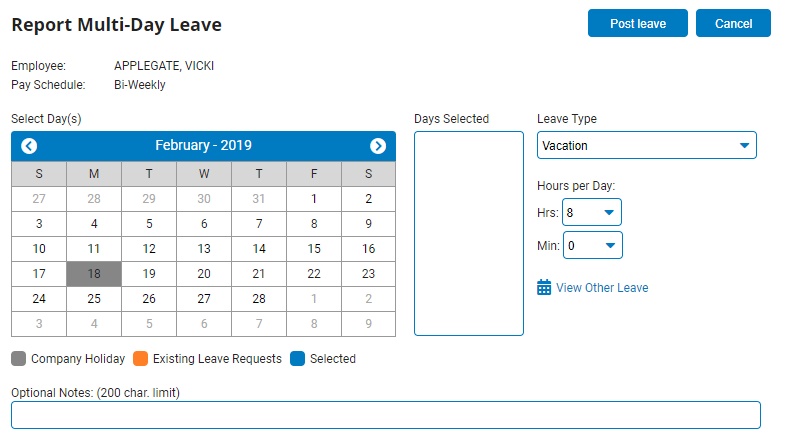
2. Using the calendarcalendar, click on each day where leave will be reported. As you click on days, they will appear in the Days SelectedDays Selected box.
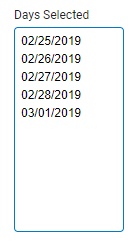
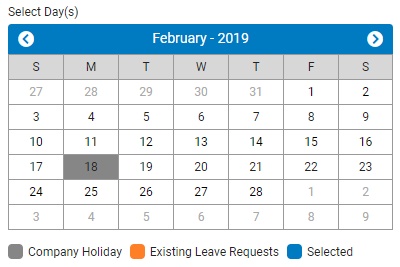
Note: To remove a selected day, double-click the day in the Day Selected box.
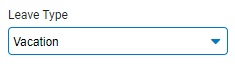
3. Click the Leave TypeLeave Type pull-down menu and select the appropriate leave type to report.
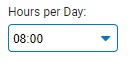
4. Use the Hours per DayHours per Day pull-down menus to select appropriate number of hours to report for each of the days selected.
Example: If you select five days in the calendar and report 8 hours per day, the system will record a total of 40 hours of paid leave.
5. If necessary, add any additional details about the entry in the Optional NotesOptional Notes text box.

6. Click the Post LeavePost Leave button.

Result: The selected days appear on both the calendar and the Hours Submitted for Selected Pay Periods table.
Correcting Employee Paid Leave SubmissionsCorrecting Employee Paid Leave Submissions
|
In reviewing the Time Clock Review for your employees, you notice that one of your employees has not reported a sick day that they took off. They have entered 8 hours of regular pay instead of sick time on the day in question. Therefore,
you can correct the entered hours by using the Time Clock Review edit features. |
To correct a previously submitted employee paid leave submission:
1. Click the EditEdit button in the row of the Hours Submitted for Selected Period table matching the paid leave entry you wish to edit.
![]()
The Report Leave EditReport Leave Edit page displays.
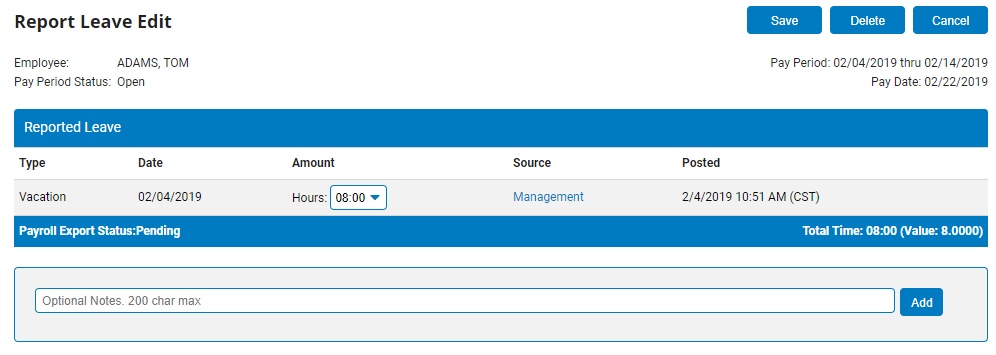
2. Change the amount of paid leave to be applied using the Hours and MinutesHours and Minutes drop-down boxes.

3. If necessary, enter in an hourly rate in the Override RateOverride Rate text box to be used instead of the employee's default hourly rate when processing the adjustment.
4. If necessary, add any additional details about the entry in the Optional NotesOptional Notes text box and click the AddAdd button to record these changes on the edit.

5. Click the SaveSave button.

Result: The paid leave entry you just edited is changed to reflect the new paid leave amount you entered, and the Paid Leave Reporting page displays.
Deleting Employee Paid Leave SubmissionsDeleting Employee Paid Leave Submissions
|
In reviewing the time clock review for your employees, you notice that one of your employees has entered in 8 hours of leave, but they only took off half a day. After speaking to the employee, you realize that they mis-entered their leave
time on the day in question. By editing the time clock entry, you are able to adjust the hours that will be reported to payroll. |
To delete a previously submitted employee paid leave submission:
1. Click the EditEdit button in the row of the Hours Submitted for Selected Period table matching the paid leave entry you wish to edit.
![]()
The Report Leave EditReport Leave Edit page displays.
2. Click the DeleteDelete button.

Result: The paid leave entry you just edited is deleted, and the Paid Leave Reporting page displays.
Your changes to employee leave are saved.
10. If necessary, select the employee for which you would like to add paid leave from the EmployeeEmployee drop-down box.

The Paid Leave Reporting page displays information for the selected employee in the selected pay period.
Note: This field defaults to the employee you selected on the Time Clock Reporting page. This drop-down box allows managers to adjust time for multiple employees without having to return to the Time Clock Reporting page after each adjustment.
11. After adjusting employee paid leave as necessary, click the BackBack button.
![]()
Result: The Time Clock Review page displays the changes you have made to the employee's paid leave for the selected pay period.
Related Help Topics: