
The Expense Analysis report allows you to view a summary of all expense and advance requests submitted by your employees (including the amounts submitted) as well as the status of those requests.
To run this report:
1. On the Management Navigation Menu, click Wage & Tax > Expense ApprovalWage & Tax > Expense Approval.
The Expense ReimbursementsExpense Reimbursements page displays.
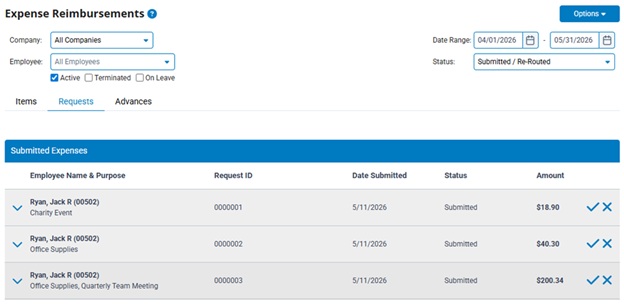
2. Select Expense Analysis Report from the OptionsOptions drop-down menu.

The Expense AnalysisExpense Analysis page displays.
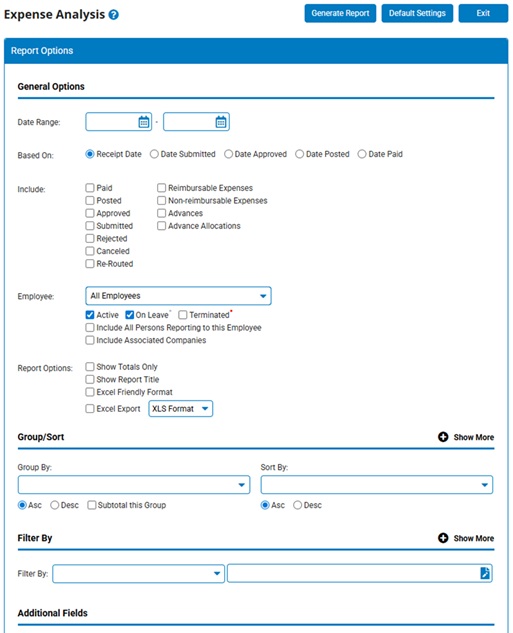
3. Select a Based OnBased On radio button to specify what type of date will be used to sort the report.

The dates you enter in the next step will be used to sort the report by receipt date, date submitted, date approved, or date paid.
4. Enter the start and stop dates through which you would like to view a summary of expense and advance requests in the Date RangeDate Range fields.

Notes:

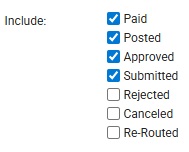
5. Check the desired status requeststatus request checkboxes to include requests with the listed status in the report (for example, checking Approved and Rejected would show requests with those statuses only).
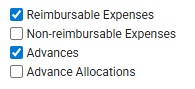
6. Check the desired request typesrequest types checkboxes to include requests of the selected type in the report (for example, checking Expenses by itself would include expense requests only).
7. If necessary, select a specific employee from the EmployeeEmployee drop-down box to view expense and advance requests for that employee only.

Note: Leave the field set to All Employees to view a report including all employees at your company.
8. If desired, specify how employees will be grouped and/or sorted in the generated results by configuring the Group/Sort optionsGroup/Sort options.

Note: To add multiple layers of grouping and/or sorting, click the Show More option to expand the section.
9. If desired, use the Filter By optionsFilter By options to refine the generated results to a specified group or segment of your organization.

10. If desired, select any optional fields you would like included in the report by checking the checkbox by each optional field in the Optional FieldsOptional Fields section of the report.
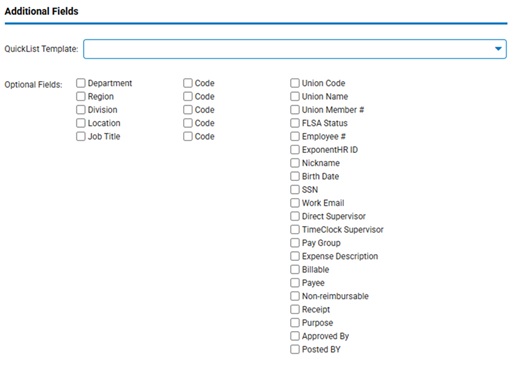
Checking the Optional Fields check boxes will add/suppress additional columns from the formatted results.
Note: For the fields listed on the left, you have the option to include the description and/or the code for the respective field.
11. If necessary, select additional display options for the report from the Report OptionsReport Options checkboxes.
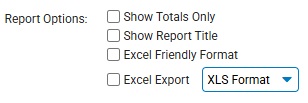
Notes:
12. Click the Generate ReportGenerate Report button.

Result: The report you selected displays in a new window with the options you selected.
Notes:


Related Help Topics:
Generating a Report Using a Template