
Employees are permitted to increase or decrease FSA Transit/Parking deferral election at any time and for any reason. This can be accomplished through the Transit/Parking FSA Election Change Life Event.
Note: This Life Event type is only an available option for employees who are currently eligible or will become eligible within the next 30 days.
A Wizard will step you through the process necessary to complete the benefits change request. If you need to leave the process prior to completion, use the ExitExit button to save your changes and resume later.

1. On the Management Navigation Menu, click Benefits > Life EventsBenefits > Life Events.

The Life EventsLife Events page displays.
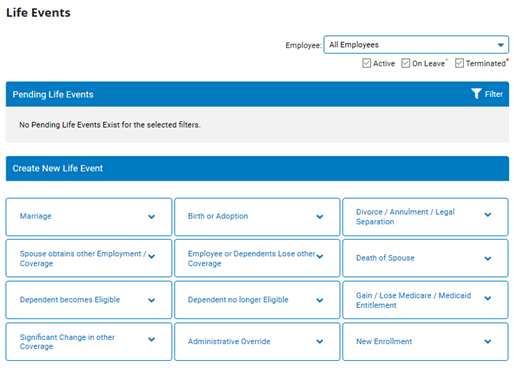
2. Select the employee whom you would like to report a birth or adoption life event for from the EmployeeEmployee drop-down box.

3. In the Create New Life Event section, select Transit/Parking FSA Election Change Life Event type.
The Life Event WizardLife Event Wizard displays.
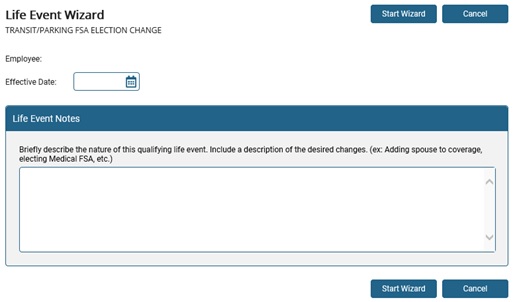
4. Enter a date in the Effective DateEffective Date text box.

5. The Life Event NotesLife Event Notes text box offers the opportunity to record any special instructions or other note for internal record keeping.

6. If there are any files you would like to attach to assist with the validation of the life event, they may be added in the Supporting DocumentsSupporting Documents section.

7. Click the Start WizardStart Wizard button.

The Current Year ElectionsCurrent Year Elections page displays.
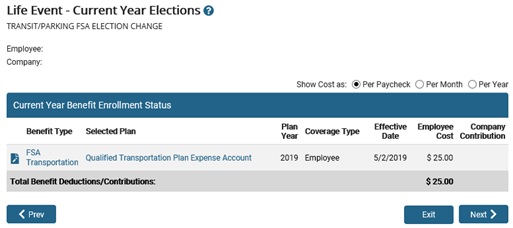
8. Click the EditEdit icon next to the listed FSA plan.
![]()
The FSA Transit/Parking Plan EnrollmentFSA Transit/Parking Plan Enrollment page displays.
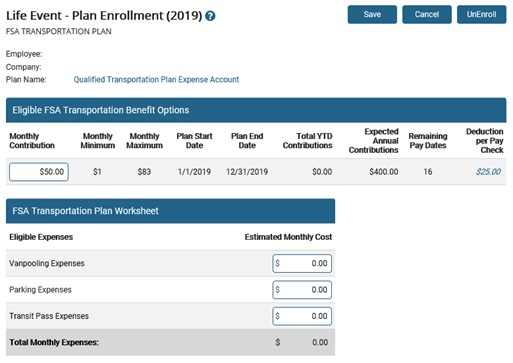
9. In the Monthly Contribution field, enter the desired amount to contribute as an employee to the FSA Transit/Parking plan each month.
To assist with determining the amount to contribute, you can use the available FSA Plan Worksheet to enter in various values to test and review different monthly expense totals based on the estimated monthly costs entered. Additionally, you can click on the Deduction per Pay Check value to see how much will be deducted from each paycheck in order to reach the monthly contribution amount each month.
Note: To terminate participation in the FSA plan offering, click the Unenroll button.
10. Once satisfied with the selection made, click the Save button.
11. Click the NextNext button.

The Life Event Wizard (Information) page displays.
12. Click the NextNext button.

The Life Event Wizard - ValidationLife Event Wizard - Validation page displays, which provides a summary of the plan election details.
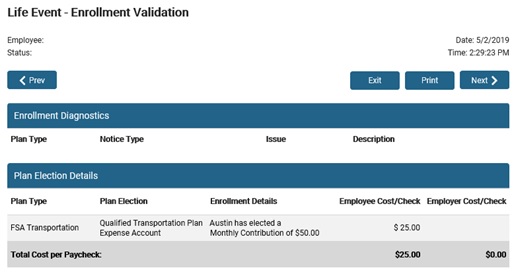
Note: The Validation process will verify that all modified elections meet certain enrollment rules according to your plan rules. If critical errors are encountered, they will be indicated in this report. You must correct these errors before submitting the Life Event.
13. Carefully review all information on this report.
Notes:
If you need to adjust any information, click the PreviousPrevious button and return to the Benefit Enrollment screen.

Click the PrintPrint button to obtain a printed copy of this report.

14. Click the NextNext button.

The Life Event Wizard (Information) page displays.
15. Click the NextNext button.

The Life Event SummaryLife Event Summary page displays all changes to your benefits as a result of the birth or adoption.
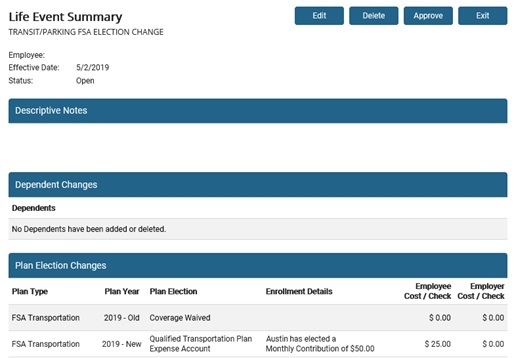
To edit or view detailed Life Event elections, click the EditEdit button.

To permanently cancel changes prior to execution, click the DeleteDelete button.

16. If all changes are accurate, click the ApproveApprove button.

Result: The Life Event is submitted to the benefits administrator for approval.
Notes:
Although you may exit the life event wizard at any time by clicking the ExitExit button, exiting the life event does not delete it. The life event will remain in the system until you approve it or delete it.

Changes will not occur until the Life Event is approved by the benefits administrator and the designated effective date is reached. Once approved, all changes will be reflected in the employee's records on the effective date.