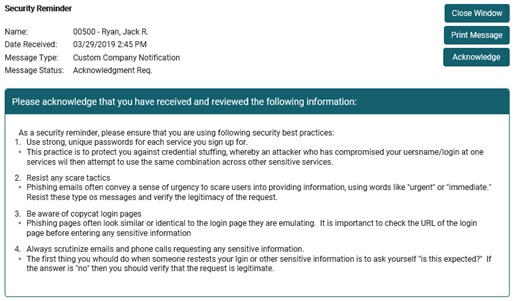
You have many options in setting up a Message Center Notification that appears in an employee's Message Center in ExponentHR. You can require that the employee acknowledge that they have read the notification. You can also choose to send the notification to the employee's work e-mail address, in addition to the Message Center, if they do not have regular access to ExponentHR, for example.
You can include a link to a specific page or published document in the ExponentHR site (such as to the New Plan Elections page in the Open Enrollment utility) or an external site (such as the corporate Web site for your 401(k) or benefit plan provider). Keywords allow you to customize the message further by dynamically populating fields with information from the database (such as today's date and the employee's first name and next pay day).
Additionally, you can have the ExponentHR system initially send out the respective notification to all employees that currently meet the defined Recipient group criteria. Then, on each specified Recurrence period (daily, weekly, etc.), have ExponentHR automatically identify any employees who are new to the Recipient group designation and send the notification to just those newly-identified employees.
As a short-term cost-cutting initiative, your company is ceasing international travel for business trips for the next three months. You need not only to let employees know about the policy change, but also require them to acknowledge receipt of the notificationnotification. This way, if there are any expenses submitted that contain airfare for an international flight, you can confirm whether or not that particular employee knew about the travel embargo and when they received the message.
To create a Message Center Notification:
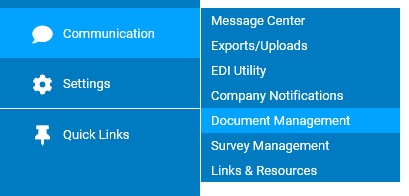
1. On the Management Navigation Menu, click Communication > Company NotificationsCommunication > Company Notifications
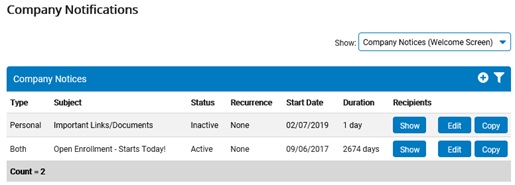
The Company NotificationsCompany Notifications page displays.
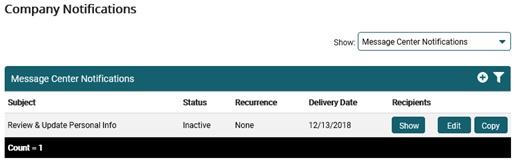
2. Select Message Center Notifications in the Show drop-down box.
The Message Center NotificationsMessage Center Notifications section displays, with a list of all Message Center Notifications that have been set up.
3. Click the Create New Notification (+) button.
The Message Center NotificationMessage Center Notification page displays.
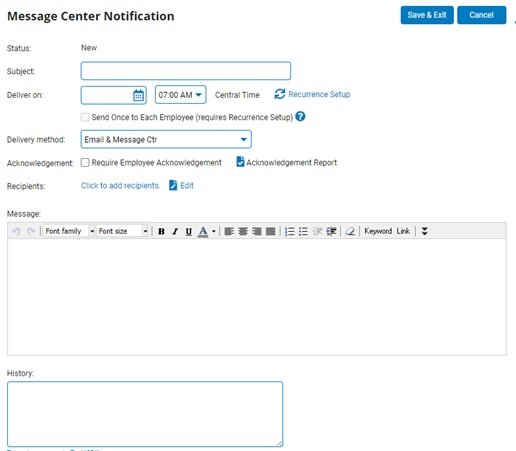
4. Type a title for the Message Center Notification in the Subject box.
5. In the Deliver On field, enter the delivery date (or click the calendar icon) and select the delivery time from the drop-down box.
Note: The date/time must be at least 15 minutes after you activate the Message Center Notification to allow time for processing.
6. To set the Message Center Notification to repeat at certain intervals, set up a recurring notice.
Note: You can have the recurring message be sent to the same list of recipients or only sent to employees who have not yet received the respective notice.
Setting Up a Recurring NoticeSetting Up a Recurring Notice
1. Click the Recurrence Setup button beside the Start Date box.
The Notice RecurrenceNotice Recurrence page displays.

2. In the Time section, click a time in the Start drop-down box to change the start time.
Note: To change the start time to a time other than on the hour, click the number of minutes past the hour in the Time Increment box in the Range of recurrence section
3. In the Recurrence pattern section, click the radio button for how often you want the notice to repeat.
The display changes based on which pattern you select.
Pattern Additional Steps
Daily Click the radio button for every (so many) day(s) or every weekday (Monday through Friday). If every (so many) day(s), type the number of days apart.
Weekly Type the number of weeks apart and select the day of week check box.
Monthly Click the radio button for how you want to enter a specific day of the month. Then, either type the numbered day of the month (1 through 31) and how many months apart, or select the first, second, third, fourth, or last day of the week and how many months apart.
Yearly Click the radio button for how you want to enter a specific day of the year. Then, either select the month and type the date, or select the first, second, third, fourth, or last day of the week and the month you want it in.
4. In the Range of recurrence section, type a new start date (or click the calendar icon), and then click the radio button for when you want the recurring notice to end. Either type the number of occurrences, or type the actual date (or click the calendar icon).
5. Click the OK button to save your schedule.
7. In the Delivery Method drop-down box, select if the message is to be sent via text message and/or to the employee's preferred email address in addition to their online Message Center..
Note: For the message to appear in the employee's e-mail, the employee's work e-mail address must be saved in their personal information.
8. Select the Require Employee Acknowledgement check box if you want the recipients to acknowledge that they have received the message in Message Center.
Note: The employee will be prompted to provide an acknowledge upon each successful login until the recipient accesses the message and acknowledges it.
9. Select the Send Once to Each Employee check box if you want to have the message put on a recurring schedule, yet ensure that no employee receives the notification more than once.
Note: When this feature is used in conjunction with the optional New Hires Only recipient restriction, the result will be a message which will be delivered only to newly hired employees.
10. Select the recipients you would like to receive the Message Center Notification.
Selecting RecipientsSelecting Recipients
1. Click the link to add recipients or the recipients Edit icon.
The Notifications RecipientsNotifications Recipients window displays.
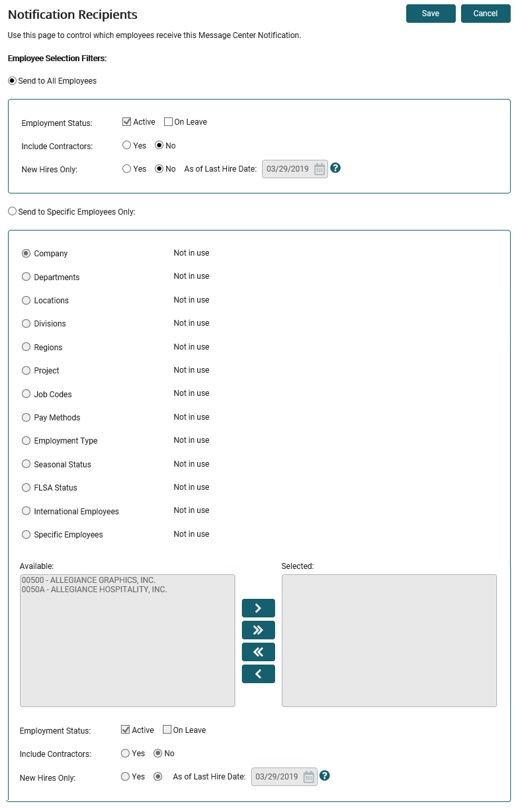
2. Click the radio button for whether you want to send the notification to all employees or only specific employees.
3. If you selected to send the notification to specific employees only, select the radio buttons for which categories to include in the list of available filters. Then, click the filters you want in the Available list and click the --> button to move them to the Selected list.
Notes:
The types of available criteria vary from company to company, but common types are department, location, Job Codes, etc.
Select the check box to include on-leave employees in the Available list if desired.
The filters work in conjunction with each other. Select more than one category at a time to further restrict the audience.
4. If selecting the New Hires Only option, ExponentHR will restrict the recipient group to only those employees with a Last Hire Date on or after the designated date.
5. Click the Save button.
11. Type the text you want to appear in the message in the Message box and insert keywords and a link, if necessary.
Inserting KeywordsInserting Keywords
1. With the cursor positioned where you want the keyword to appear in the message, click the Keyword button. (See help topic below for detailed explanation and full glossary of keywords)
The Insert KeywordInsert Keyword window displays.
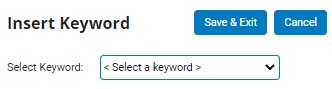
2. Click the keyword you want to use in the Select Keyword drop-down box.
3. Click the Save & Exit button.
Inserting a LinkInserting a Link
Click the Link button in the Additional Information section, and then click the menu option for the type of link you want to use.
|
Option |
Additional Step(s) |
|
External Website |
1. If you do not want to use the actual Web site address for the link text, type a description in the Link Description box. 2. Type (or copy/paste) the URL in the Website Address box. 3. Click the Insert Link button. |
|
Personal Site Page |
In the site map for the ExponentHR Personal View, click the page for the link. |
|
Personal Site Document |
1. Type a word or phrase to search for related documents visible in the Personal View of ExponentHR, and then click the Search button. You can also select search options for searching the text, doing multiple word searches, and searching only drafts. Note: You must have access rights to Document Management to attach a draft, or a document with a publish date in the future. 2. Next to the title and description of the document you want, click Add Link. |
|
Management Site Page |
In the site map for the ExponentHR Management View, click the page for the link. |
|
Management Site Document |
1. Type a word or phrase to search for related documents visible in the Management View of ExponentHR, and then click the Search button. You can also select search options for searching the text, doing multiple word searches, and searching only drafts. Note: You must have access rights to Document Management to attach a draft, or a document with a publish date in the future. 2. Next to the title and description of the document you want, click Add Link. |
12. Click the Activate button.
The status changes to Pending.
Note: You cannot activate a Message Center Notification that does not have any recipients selected.
13. Click the Save & Exit button.
Result: On the delivery date, the Message Center Notification is sent to the selected recipients' Message Center in ExponentHR.
Related Topics:
Viewing the Acknowledgement Report
Editing Message Center Notifications
Utilizing Keywords in Notifications