The Payroll Adjustments utility allows you to manage one-time deductions in the Time Clock system for multiple employees. When employees view their time using the Time Clock Reporting Tool, all items subtracted from employee paychecks will appear as a bottom line adjustment to pay in the Misc Adjustment section.
In
response to your company's fund-raising drive for a local charity,
several employees have elected to make a one-time donation.
By using the Payroll Adjustments feature in ExponentHR,
you can easily create a payroll deduction for this group of employees. |
To create a batch of non-recurring deduction items:
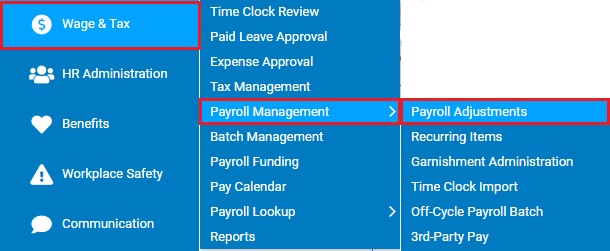
1. On the Management Navigation Menu, click Wage & Tax > Payroll Management > Payroll AdjustmentsWage & Tax > Payroll Management > Payroll Adjustments.
The Payroll AdjustmentsPayroll Adjustments page displays.
2. Manually enter deduction adjustments for employees (Grid Input Method) or import adjustments from a file (File Import Method).
Using Grid Input MethodUsing Grid Input Method
You may manually enter deduction adjustments for each employee on the list, if necessary.
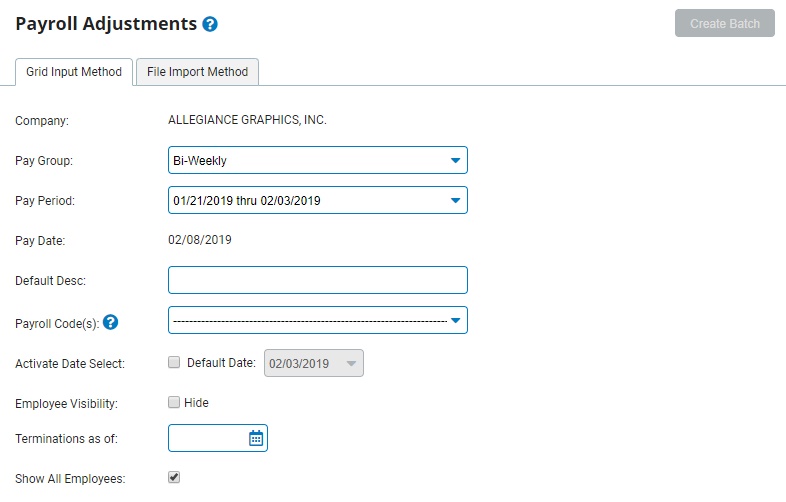
1. Select the Grid Input MethodGrid Input Method option to create the payroll adjustment batch.
2. Select the pay group to which you would like to add a supplemental deduction item from the Pay Group drop-down box.
3. Select the pay period in which you want to apply the supplemental deduction item from the Pay Period drop-down box.
4. Enter a description of the supplemental deduction item in the Default Desc text box.
Note: This description is used strictly as a descriptive reference in the Time Clock Reporting tool.
5. Select the deduction code that best matches the supplemental deduction item from the Payroll Code(s) drop-down box.
6. If you want this supplemental item to apply to employees even if they are terminated during the pay period, enter a date in the Terminations As Of text box.
If an employee is terminated during the pay period, the employee will still receive the supplemental item as long as their termination date falls on or after the date you selected.
7. If you want to hide this supplemental item from employees until their pay date, check the Employee Visibility: HideEmployee Visibility: Hide check box.

The deduction adjustment will still be applied to employee paychecks, but will not be displayed when the employee reviews their hours in ExponentHR. Employees will instead see the deduction adjustment on their check stubs when they are paid.
8. To enable cost allocation overrides, select the Allow Cost Allocations check box.
9. The Overtime Applicability area displays, allowing you to apply the supplemental pay to past overtimeapply the supplemental pay to past overtime.
Enter a date range to which the supplemental pay applies in the Overtime Applicability start and end date boxes.
Note: If you do not want to apply the supplemental pay to past overtime, select the None option.
Result: Based on the amount of supplemental pay you enter, ExponentHR recalculates the OT rate for the specified date range and issues retroactive overtime pay. The OT adjustment appears in the Time Clock report and as a misc. adjustment on the employee's paycheck.
10. Select the Create BatchCreate Batch button.

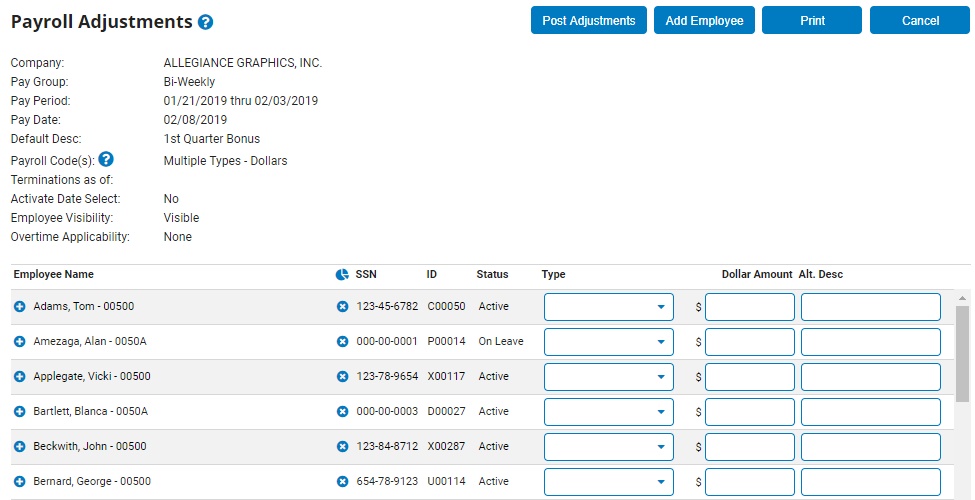
The Payroll AdjustmentsPayroll Adjustments page displays a list of employees in the pay group.
Manually Entering Payroll AdjustmentsManually Entering Payroll Adjustments
1. If you selected multiple codes for the Payroll Code, select the appropriate deduction type from the Type drop-down list.
2. Enter the amount of the adjustment to be applied to each employee's paycheck in the Dollar Amount text box of the row associated with the employee.
3. If desired, enter an Alternate Description to appear on the Time Clock Reporting tool for an employee instead of the previously entered Default Description.
4. To enter an additional deduction adjustment for an employee included in the payroll group you selected, click the Add EmployeeAdd Employee button and select the employee.

A new row for the employee appears in the Payroll Adjustments table -- complete the Dollar Amount and Alternate Description text boxes, as necessary.
Notes:
You may add a
new row for an employee already listed in the table,
if necessary, to itemize multiple
payroll itemsmultiple
payroll items for a single employee.
Click the Insert Additional Employee Row button (![]() ) next to the employee's
name, and then enter one deduction on each row. These
deductions will be itemized and reported separately
for the employee.
) next to the employee's
name, and then enter one deduction on each row. These
deductions will be itemized and reported separately
for the employee.

If you chose to allow cost allocations, an icon appear next to the employees for whom you can override the default allocations.
5. If you want to change an employee's default allocations to specific classifications, you can override the cost allocations.
Override cost allocationsOverride cost allocations
Notes:
The employee must be authorized for the classifications in Cost Allocation Setup.
The allocation options in Payroll Adjustments use the same classification fields that are enabled for the employee in Time Clock.
The allocation override is 100% to the specified classification(s). To split the allocation, you must post the adjustment in multiple records or use the percentage allocation option available in Time Clock Review.
1. To create an allocation override, click the red icon.
The Edit Cost AllocationEdit Cost Allocation page displays.
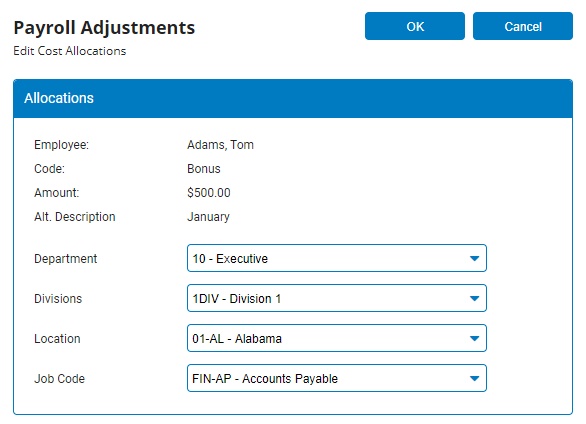
Note: To edit an allocation override, click the green icon.
2. Select the correct values in the classification field(s).
3. Click OK.
Result: A running total of all entered adjustments displays at the bottom of the screen.
Using File Import MethodUsing File Import Method
You may import a previously created file of employee deduction adjustments, if necessary.
1. Select the File Import MethodFile Import Method option to create the payroll adjustment batch.
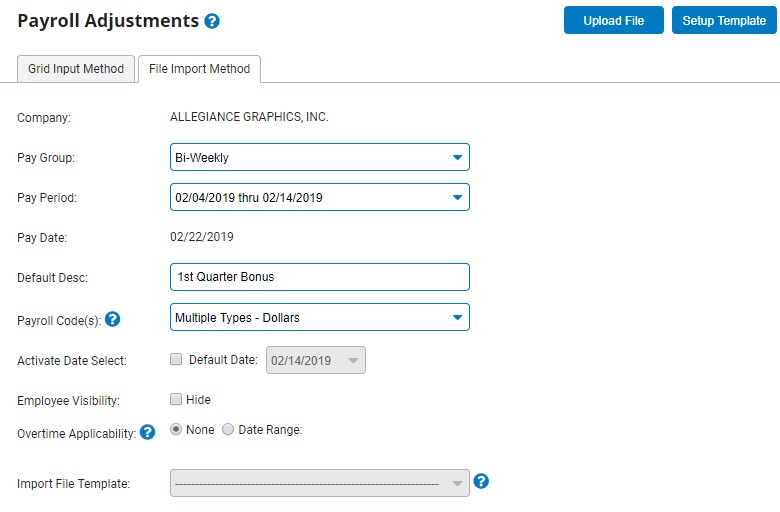
2. Select the pay group to which you would like to add a supplemental deduction item from the Pay Group drop-down box.
Note: Supplemental items can be imported for any employee in that is associated with the selected pay group, regardless of current employment status.
3. Select the pay period in which you want to apply the supplemental deduction item from the Pay Period drop-down box.
4. Enter a description of the supplemental deduction item in the Default Desc text box.
Note: This description is used strictly as a descriptive reference in the Time Clock Reporting tool.
5. Select the deduction code that best matches the supplemental deduction item from the Payroll Code(s) drop-down box.
Notes:
By selecting Multiple Types, you can upload a file using a custom file import template.
By selecting one of the options in the Multiple (Standard File Import) section of the available drop-down list, you may upload a file with multiple payroll codes of the same type (dollars, hours, deductions, contributions, or other options) using the Standard ExponentHR Import TemplateStandard ExponentHR Import Template.

6. If Multiple Types has been selected in the Payroll Codes(s) drop-down box, select the appropriate custom template in the Import File Template drop-down box.
Note: To learn how to create a custom or standard payroll adjustment file, see Related Help Topics at the bottom of this page.
7. If you want to hide this supplemental deduction item from employees until their pay date, check the Employee Visibility: HideEmployee Visibility: Hide check box.
The deduction adjustment will still be applied to employee paychecks, but will not be displayed when the employee reviews their hours in ExponentHR. Employees will instead see the deduction adjustment on their check stubs when they are paid.
8. To enable cost allocation overrides, select the Allow Cost Allocations check box.
9. The Overtime Applicability area displays, allowing you to apply the supplemental pay to past overtimeapply the supplemental pay to past overtime.
Mark the radio button beside Date Range and enter a date range to which the supplemental pay applies in the Overtime Applicability start and end date boxes.
Note: If you do not want to apply the supplemental pay to past overtime, select the None option.
Result: Based on the amount of supplemental pay you enter, ExponentHR recalculates the OT rate for the specified date range and issues retroactive overtime pay. The OT adjustment appears in the Time Clock report and as a misc. adjustment on the employee's paycheck.
10. Select the Upload FileUpload File button.

The Upload Payroll Import FileUpload Payroll Import File page displays.

11. Click the Select FileSelect File button to open a list of folders on your computer.

12. Navigate through the folders and select the appropriate payroll adjustment file from the list.
13. Click the Open button.
14. Click the Upload FileUpload File button.
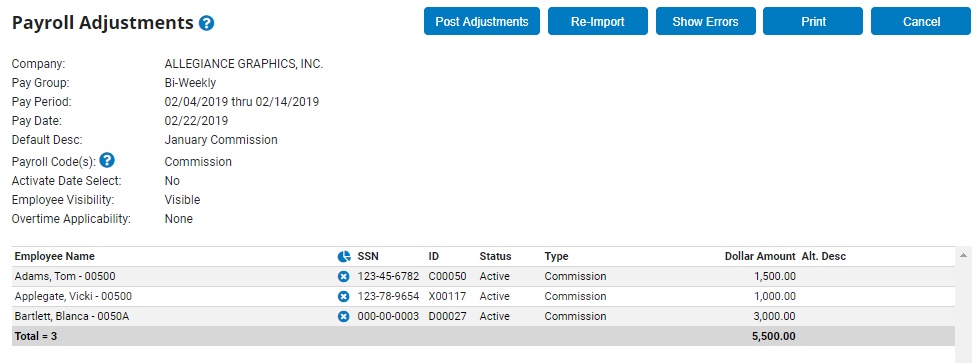
Result: As a Payroll Adjustment ReviewPayroll Adjustment Review, the deduction adjustment amounts in the file will automatically be reflected for the applicable employees in the pay group. A total of all adjustments will display at the bottom of the screen.
Notes:
If you import multiple payroll adjustment entries for the same employee (for example, an employee with multiple deductions), these entries will be imported as separate line items.
If the file is not a valid deduction adjustment list or if other errors exist for particular line items, you will receive an error message.
You cannot edit the records imported form a file. To edit the dollar amounts, update import file as needed and select the Re-ImportRe-Import button to have the updated file replace the old file's information before posting the adjustments.

3. Once all the adjustments are entered, click the Post AdjustmentsPost Adjustments button.

A summary of all employee payroll adjustments you've made displays.
4. When satisfied with the summary, click the Confirm PostConfirm Post button to have the adjustments applied to selected pay period.

If you want to change adjustments, click the Edit DataEdit Data button to return to the list of employees in the pay group.

Result: A pop up message displays 'Post Complete,' and the Payroll Adjustments page displays.
Related Help Topics
Creating Payroll Adjustment Files
Creating Supplemental Pay for Multiple Employees