When setting up documents to be accessed through ExponentHR Web pages, you upload the file, specify if it is ready to be published, and assign it to a folder. Before you can add a document to a folder, however, you must set up the folder. See the Related Help Topics below for more information.
To add a document to a folder:
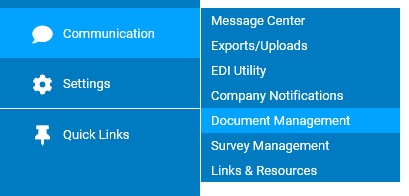
1. On the Management Navigation Menu, click Communication > Document ManagementCommunication > Document Management
The Document ManagementDocument Management page displays.
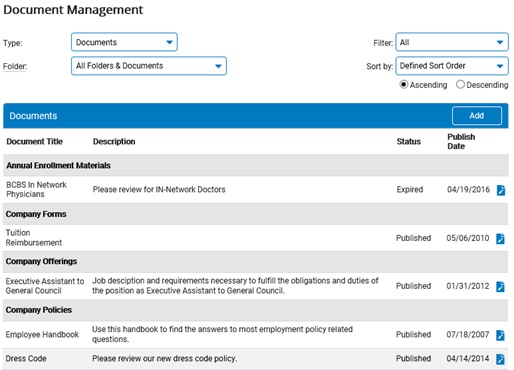
2. Select Documents in the Type drop-down box.
The list of existing documents displays.
3. Select the folder to which you want to add the new document in the Folder drop-down box.
4. Click the Add button.
The Add New DocumentAdd New Document page displays.
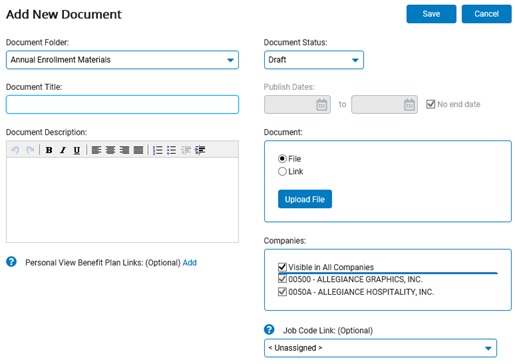
5. If you need to change the folder to which the document will be assigned, select the folder from the Document Folder drop-down box.
Note: Folders without any documents assigned to them appear gray in the list.
6. Type the name of the document in the Document Title text box.
7. Type additional information in the Document Description text box and format it if desired.
8. Select whether the document is in draft form or ready to be published in the Document Status drop-down box.
9. If the document is ready for publishing, type the start and end dates or select them using the calendar icon.
Note: To publish the document for an indefinite period of time, select the No End Date check box.
10. Upload the file, or set up a link to an external Web site if the document is already posted elsewhere.
Uploading the fileUploading the file
1. Click the File radio button in the Document box.
2. Click the Upload File button.
The File UploadFile Upload page displays.
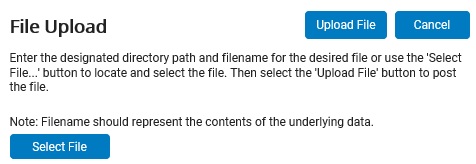
3. Type the full path and filename of the desired file, or click the Browse button to find it on your computer.
4. Click the Upload File button.
Result: The Add New Document page displays, with the uploaded file information.
Setting up a linkSetting up a link
1. Type the address for the external Web site in the URL text box.
Result: The Add New Document page displays, with the entered web link.
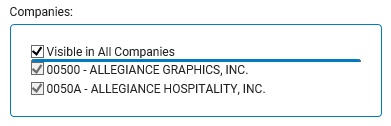
11. If your organization has multiple companies, select the check box next to each company within the CompaniesCompanies section that you want to have access to the posted document . If you want all companies within your organization to have access to the document, select the Visible in All Companies check box.
Notes:
Selecting the Visible in All Companies option will ensure that all present and future companies have access to the posted document, even in the event that additional companies are established on a later date.
For organization's with only one company, the Companies box does not display.
12. If it is an employee's Job Description document, select the applicable job code from the Job Code Link drop-down box. See the Related Help Topic for more information.
13. If it is related to a specific benefit plan, click the Add button to set up a link on the associated Benefit Plan Details page. See the Related Help Topic for more information.
14. Click the Save button.
Result: The Document Management page displays and includes the newly added document. The document is available for employees to access if its status is set to Published, the current date is within the publication date range, and the folder in which it is stored is posted to a Web page.
Related Help Topics:
Editing Web Pages to Display Folders
Setting Up Yearly Benefits Guides