
You may submit a New Hire Authorization Request EAN to notify your HR Administrator or EAN approver of new hires at your organization and provide preliminary information about the new employee.
When your company is ready to set up the new hire in ExponentHR, your HR Administrator or EAN approver needs to convert the New Hire Authorization EAN into a New Hire Enrollment EAN to add more employee information and submit it to Exponent HR. See Related Help Topics at the bottom of this page for more information.
To make a new hire authorization request:
1. On the Menu, click HR Administration > eAction NoticeHR Administration > eAction Notice.
The eAction Notice (EAN) SummaryeAction Notice (EAN) Summary page displays.
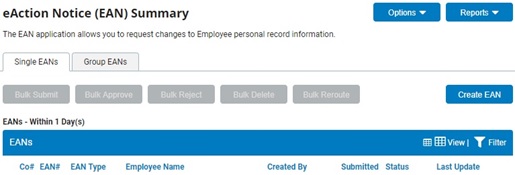
2. Click the Create EANCreate EAN button.
The Create New EAN(s)Create New EAN(s) window displays.

3. Select the New Hire Authorization Request EAN from the EAN type selection box and click the Create EANCreate EAN button.
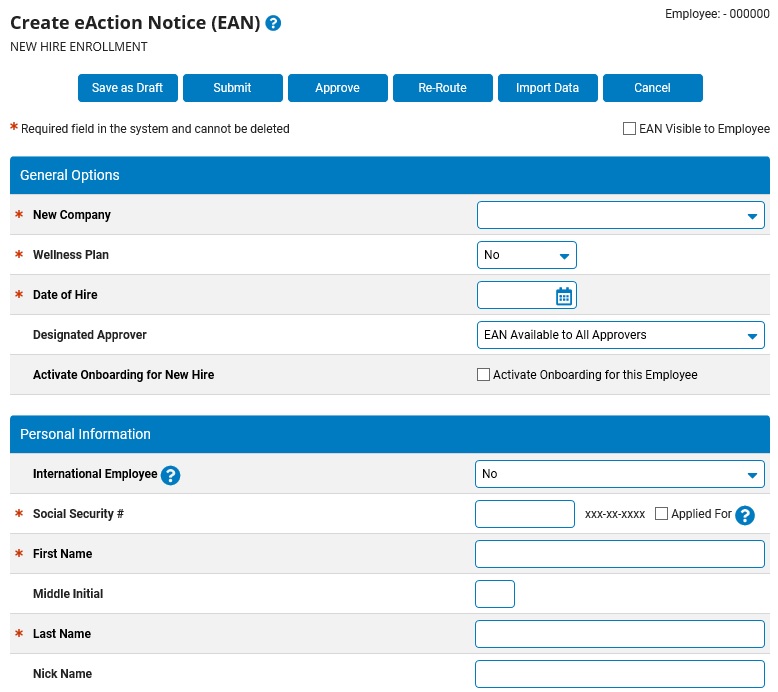
The New Hire Authorization RequestNew Hire Authorization Request page displays in a new window.
Notes:
You do not need to select an existing employee before creating this EAN, as you will create a new employee within the EAN itself.
If your organization has child companies within it, you must select the new hire's company in the New CompanyNew Company drop-down box.

4. Enter the date to make the new employee active in ExponentHR in the Date of HireDate of Hire text box.

The new employee will be able to access ExponentHR as of the date you enter, pending EAN completion.
Note: You may also select the date from a calendar by clicking the CalendarCalendar button.

5. If a specific manager needs to be responsible for the review and approval of this new hire request, select the appropriated manager in the Designated ApproverDesignated Approver drop-down box.

Notes:
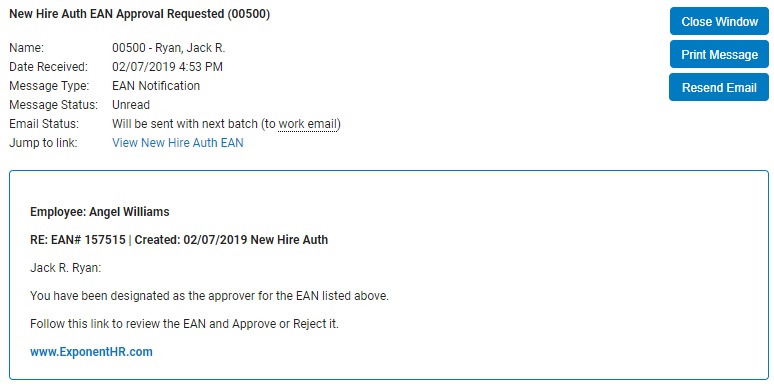
The individual assigned as the designated approver will receive a Message Center NotificationMessage Center Notification informing the manager of the pending EAN, including a link to the EAN utility where the EAN can be reviewed.
By default, the designated approver for all Consultant/Contractor Access EAN's is set to EAN Available to All Approvers, which makes the pending EAN available to all managers with EAN approval rights.
HR Administrators with EAN Approval rights to the EAN will always be allowed to view and approve the EAN, regardless of the designated approver designation.
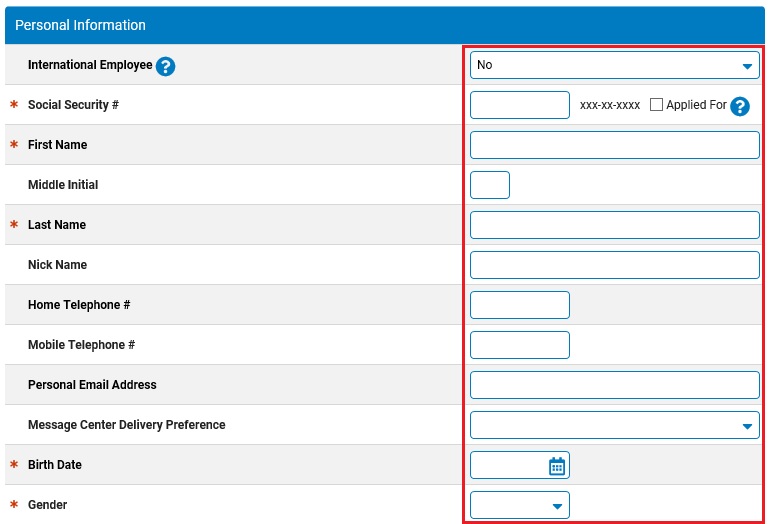
6. Complete the Personal InformationPersonal Information fields for the new employee as necessary.
Notes:
If a field has an asterisk (*) next to it, you must complete that field to submit the EAN. Fields without asterisks (*) are optional fields.
If there is an Action RequiredAction Required button next to any field that you want to edit, click it to view the required actions and supplemental instructions.

Check the Applied For option in the SSN field if the new hire has applied for an SSN but has not yet been assigned one. When checked, the ExponentHR system will bypass the SSN field requirement and automatically assign the individual a temporary (invalid) SSN beginning with a 900 upon completion (900-XX-XXXX). This unique identifier (visible only to management users) remains assigned to the employee and used for payroll processing until the actual assigned SSN becomes available and entered through a Change Personal Information EAN.
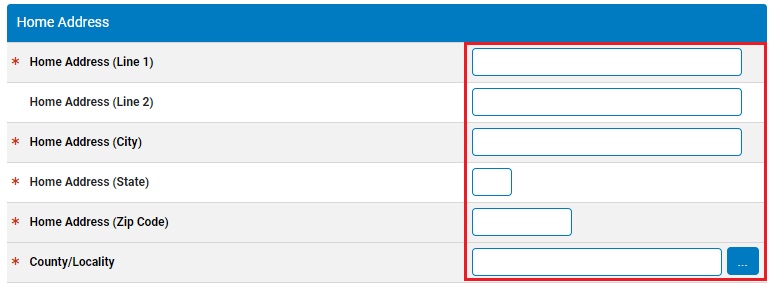
7. Complete the Home AddressHome Address fields for the new employee as necessary.
8. Click the Select New PositionSelect New Position button to select the new job to which the employee will be assigned from the Organizational Structure Management (OSM)Organizational Structure Management (OSM) page.
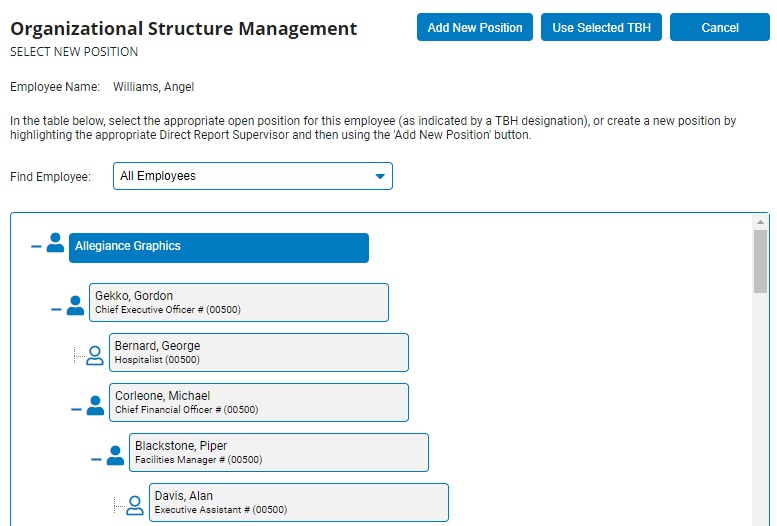
To Assign the Employee to an Existing PositionTo Assign the Employee to an Existing Position
1. Select the position the employee will now fill from an open position in the list open position in the list (marked in red)open position in the list (marked in red).

2. Click the Use Selected TBHUse Selected TBH button.

The Confirm Supervisor Selections page displays.
3. Click the Save & Return to EANSave & Return to EAN button.

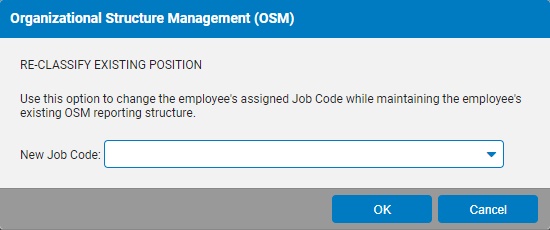
Note: An employee can be assigned to an open position without having to use the job code already assigned to that open position. To do so, after selecting the open position, click the Re-Classify Existing PosRe-Classify Existing Pos and choose the desired job title in the Re-Classify Exisiting PositionRe-Classify Exisiting Position drop-down box.
To Create a New Position for the EmployeeTo Create a New Position for the Employee
1. Select the employee's immediate supervisor from the OSM tree and then click the Add New PositionAdd New Position button.

The Add PositionAdd Position pop-up window will display.
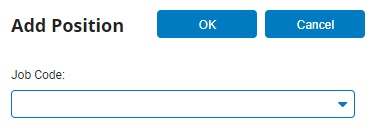
2. Select a job code for the new position from the Job CodeJob Code drop-down box and click the OKOK button.


The Confirm SupervisorsConfirm Supervisors page displays.
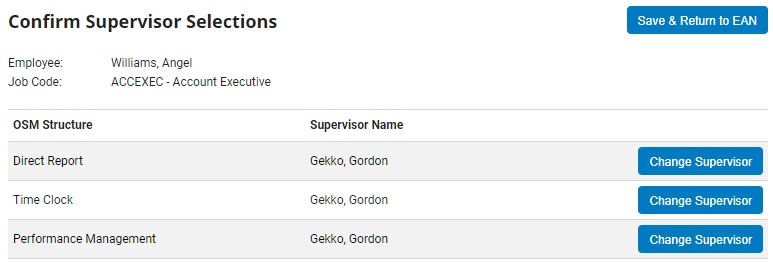
3. You may change the employee's direct report or time clock managers, if necessary.
Changing an Employee's Direct Report ManagerChanging an Employee's Direct Report Manager
1. Click the Change SupervisorChange Supervisor button.
The Organizational Structure Management (OSM) page will display.
2. Select the new direct report manager from the OSM tree.
The manager you selected will be highlighted.
3. Click the OKOK button.
The manager you selected will be assigned as the employee's direct report manager.
Changing an Employee's Time Clock ManagerChanging an Employee's Time Clock Manager
1. Click the Change SupervisorChange Supervisor button.
The Organizational Structure Management (OSM) page will display.
2. Select the new time clock manager from the OSM tree.
The manager you selected will be highlighted.
3. Click the OKOK button.
The manager you selected will be assigned as the employee's time clock manager.
4. Click the Save & Return to EANSave & Return to EAN button.
The employee will be assigned to the open position you selected from the OSM tree.
Note: The FLSA Status and Pay Grade fields are entered automatically when you choose a position.
9. Complete the Employment/Payroll InformationEmployment/Payroll Information fields for the new employee, as necessary.
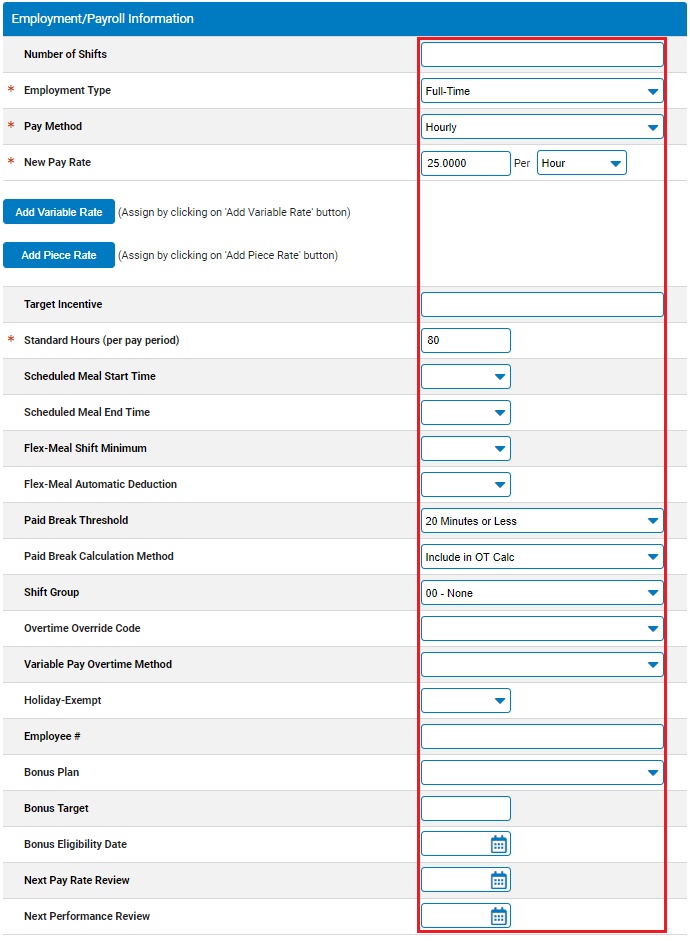
Notes:
Select the employee's status (full time, part time, and so on) from the Employment Type drop-down box.
Select the employee's pay type (salary, hour, and so on) from the Pay Method drop-down box.
Enter the employee's rate of pay (hourly, weekly, monthly, or other options) in the New Pay Rate fields.
Enter the number of hours in the employee's standard pay period (40, 80, and so on) in the Standard Hours (per pay period) text box.
If the employee's meal breaks will be taken at the same time every day and automatically deducted from their reported hours using the Edit Meal Schedules tool:
Select Yes from the Use Auto-Meal Deduction drop-down box.
Enter a scheduled meal start and end time in the Scheduled Meal Start Time and Scheduled Meal End Time fields.
If the employee's meal breaks may be taken at any time during the day but the same amount of time will be deducted from their reported hours each day using the Edit Meal Schedules tool:
Select Yes from the Use Auto-Meal Deduction drop-down box
Enter the minimum number of hours the employee must work to receive a meal break in the Flex-Meal Shift Minimum field.
Enter the number of minutes the employee is allowed for the meal break in the Flex-Meal Automatic Deduction field.
If company configuration option has been enabled to utilize functionality that systematically calculates and applies earnings adjustments in relation to California Meal Break, Rest Break, and/or Split Shift regulations (based on California legislationCalifornia legislation), the following three fields will be available for editing:
California Legislation Summary
California Meal Break
In general, the California Meal Break program awards any employee with an extra hour of pay for any day in which the employee: (a) works more than 5 hours without receiving a break of at least 30 consecutive minutes that begins no later than the end of his/her fifth hour of work, or (b) works more than 10 hours in a day without receiving two breaks of at least 30 minutes each, with the second break beginning no later than the end of the employee’s tenth hour of work. (Some exceptions may apply.) If either criteria is not met, the employee is entitled to a premium equal to one hour paid at the employee’s base hourly rate. An employee is eligible to receive up to one Meal Break Premium per workday.
California Paid Rest Break
In general, California requires employers to provide one or more 10-minute Paid Rest Breaks to an employee working more than 3.5 hours in a day. (The number of breaks is dependent upon the employee’s total hours worked in the day.) If the applicable number of breaks are not taken, the employee is eligible to a premium equal to one hour paid at the employee’s base hourly rate. This premium is separate from the California Meal Break premium.
California Split Shift
When an employee’s workday is interrupted by an extended non-paid/non-working break, the employee may be entitled to a split shift premium. The premium is calculated at the rate of one hour of the state/local minimum wage rate applicable to the employee, less the employee’s actual rate of pay in excess of the minimum wage rate multiplied by the number of hours worked by the employee in the same workday.
More can be learned about these programs by visiting the California government website.
Note: California Meal Break legislation offers each employee the option to waive his/her right to an unpaid meal break for any date on which the employee does not work more than 6 hours (or 12 hours in the case of the 2nd meal break requirement). This waiver may be manually applied upon employee request for a single date or can optionally be automatically applied for an employee on a perpetual basis by designating the Apply CA Meal Break Exception field in ExponentHR with the “Yes (with 6/12 hour waiver)” value.
Apply CA Paid Rest Break Exception - used to designate an employee as eligible to receive system-generated Rest Break Exception premiums.
Apply CA Split Shift Premium - used to designate an employee as eligible to receive shift premiums and to define the extended break threshold fields.
Apply CA Meal Break Exception - used to designate an employee as eligible to receive system-generated Meal Break premiums. Legislation does provide employees limited ability to voluntarily waive their right to a meal break. The available options and conditions are as follows:
| No | No California Meal Break calculations are applied |
| Yes | All California Meal Break calculations are applied per CA legislation |
| Yes (with 6/12 hour waiver) | Offered to employees who waive their right to an unpaid meal break for any date on which the employee does not work more than 6 hours (or 12 hours in the case of the 2nd meal break requirement) |
| Yes (with healthcare waiver) | Offered to healthcare professionals, if more than 8 hours are worked in a workday, the employee will only be required to take one meal break in the day and the break can occur any time within the first 10 hours of worked time. |
When any one of these fields is activated for a particular employee, the ExponentHR time clock system will begin monitoring that employee’s time punches to determine the applicability of the premium, and to calculate and post the premium when applicable.
Note: The calculation of the Paid Rest Break premium requires employees to begin clocking out/in to record their paid rest breaks. These short rest breaks can be treated as paid time on the job by using the existing Paid Break Options activated in Company Configuration (Time Clock) and designated on each applicable employee record using the Paid Break Threshold field. Two Paid Rest Break premium calculation methods are available: (1) Yes – Taken at any time: No penalty will be assessed if the employee takes the required number of breaks according to total hours worked in the day. (2) Yes – Taken within 4-hr Intervals: If a break is not initiated within an applicable 4-hour window, based on the employee’s start time, the penalty will still be assessed, even if the total number of breaks in the day meets the minimum required by California regulations. These fields are only visible in the management view of an employee’s personnel record, available to report on through QuickList report/templates, and may be updated through a variety of eAction Notices, including the New Hire and Employment EANs.
If the employee is exempt from holiday pay, select Yes from the Holiday-Exempt field.
If the employee is enrolled in a bonus plan, select the plan from the Bonus Plan drop-down box, then enter the target amount for the bonus and the date the employee is eligible for the bonus in the Bonus Target and Bonus Eligibility Date fields.
Enter information related to employee performance reviews and ratings in the Next Pay Rate Review and Next Performance Review fields.
10. Complete the Job InformationJob Information fields for the new employee, as necessary.
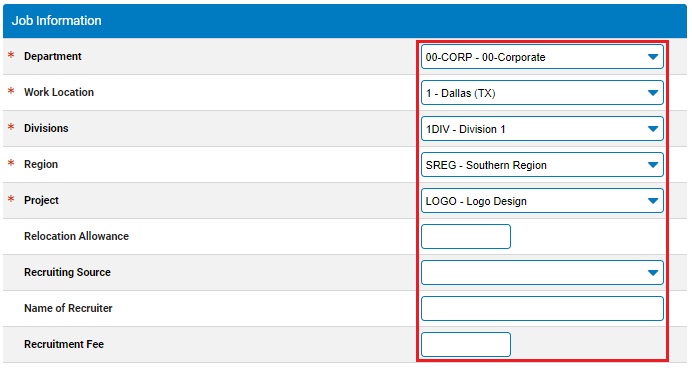
Notes:
Select the employee's Department from the drop-down box.
Select the employee's Work Location from the drop-down box.
If there are other employee classifications included in the EAN, select the appropriate desgination for the employee from the available drop-down box.
If the employee has a relocation allowance, enter it in the Relocation Allowance field.
If you have recruiting information about the employee, enter it in the Recruiting Source, Name of Recruiter, and Recruitment Fee fields.
11. Enter any notes related to the EAN in the EAN Notes text box.
12. Click the Save as DraftSave as Draft button at the top or bottom of the page to keep the requested change in a drafted status so that it may be edited and submitted for completion at a later time.

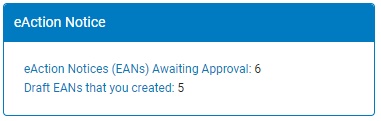
Note: When an EAN is put in a drafted status, a Draft EAN NoticeDraft EAN Notice with a link to the unsubmitted EAN is provided on the ExponentHR Dashboard.
13. After entering all necessary changes to the New Hire Authorization Request EAN, click the Submit button.
Result: The EAN you just completed is now visible on the eAction Notice (EAN) Summary page. Your HR Administrator or EAN approver can convert the EAN into a New Hire Enrollment EAN and submit it to ExponentHR for approval. See Related Help Topics for more information.
Notes:
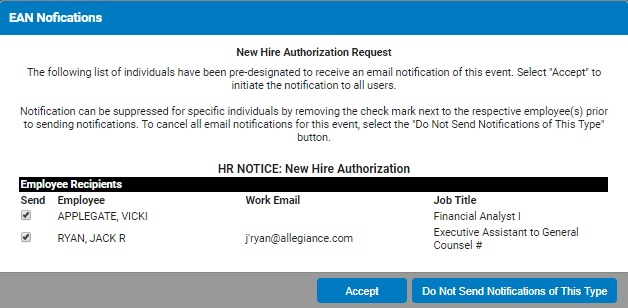
If the EAN NotificationsEAN Notifications page displays, check or uncheck the employees to whom you want to send notification of the new hire. Then click the Send button.
If you need multiple managers to review this EAN, you may re-route the EAN. See Related Help Topics for more information.
Related Help Topics: