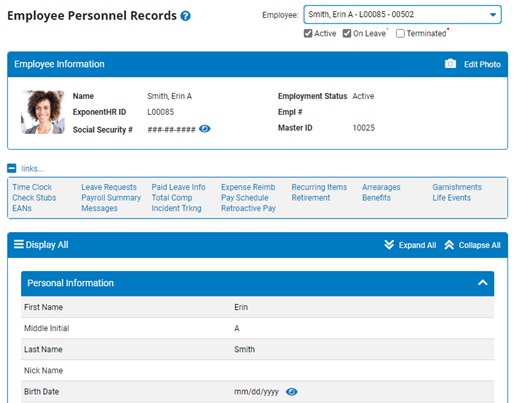
The Employee Personnel Record lookup is a quick overview of the employee personal information currently on file. The record is generally for reference only, but gives you the option to associate up to five uploaded files, such as a resume, I-9, or scanned copy of a driver's license.
Note: To have access to an employee's personal record, a manager must be granted the appropriate rights or be assigned to an HR Administrator or HR Function functional role.
To look up an employee's personnel record:
1. On the Menu, click HR Administration > Personnel RecordsHR Administration > Personnel Records.

The Employee Personnel RecordsEmployee Personnel Records page displays.

2. Select a specific employee from the Employee drop-down box to view personal information for that employee.
Employees can be searched for by entering any of following:
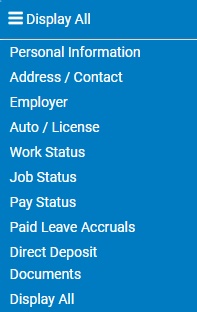
The Employee Personal RecordsEmployee Personal Records page updates to show information for the selected employee. The page defaults to show all information, but may be refined to show just a specific section by clicking the section drop-down list in the header row (icon next to "Display All" text).

Note: If an employee has more than one record within your organization, click on the displayed Master ID to see a list of each record that is associated with the employee (selecting any of those alternate records will update the page to view that personnel record). The Master ID is a unique value that is assigned to each employee and remains consistent across all records for the individual within your organization
3. Click a link on the Quick Links section at the top of the record to go directly to the specific functional page for the selected employee, such as their Time Clock, Leave Requests, EAN management, or Check Stubs.
Notes:
4. The selected employee's personal information displays.
Notes:
 ) to select from the list of available templates that may be used to append this section. To edit or create a new (QuickList) template that is applicable to employee records, please see related help topic below.


![]()
5. If a custom table has been added (for uniform size or driving information, for example), you may be able to add, edit, and delete rows directly in personal information.
Adding, Editing, or Deleting Rows within tablesAdding, Editing, or Deleting Rows within tables
To add a row:
1. Click the Add RowAdd Row button.

The Add/Edit Row page displays.
2. Type the information in the boxes.
3. Click the Save button.
To edit a row:
1. Click the EditEdit button next to the row you want to edit.
![]()
The Add/Edit Row page displays.
2. Type over the information in the boxes.
3. Click the Save button.
To delete a row:
1. Click the EditEdit button next to the row you want to delete.
![]()
The Add/Edit Row page displays.
2. Click the Delete button.
Note: Custom table information for employees may also be viewed and edited (based on access rights) through the Custom Employee Tables utility. (see related help topic below)
6. Attach files to the employee's personnel record.
Note: The file size limit is 5MB per file.
1. In the Documents table, click the Add FileAdd File button.

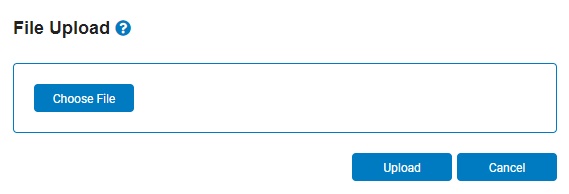
The File UploadFile Upload page displays.

2. Click the Choose FileChoose File button to locate and select the file.

3. In the Category drop-down list, select the category to which the file being uploaded belongs.
Note: The list of available categories are managed through the Employee Documents section of Company Configuration administrator page.
4. Click the UploadUpload button.

Once uploaded, users with access rights to Employee Personnel Records will be able to view all uploaded documents that belong to the categories to which the user has appropriate view rights.
Related Help Topics
Creating/Editing Templates for use to add more fields to the Employee Information section