
Managers may change their employee's jobs when an employee is promoted or moved to a different position within the company. The Job Change EAN allows you to update a specific employee’s job informationjob information.
OSM Job Position (including Job Title)
Supervisor
Department
Work Location
Cost Center
Phone Number
Note on Completion: After the EAN is approved for completion, it will immediately complete unless:
It has a future effective date.
The current date is during the Payroll Processing Period.
The effective date is after the Pay Period.
An earlier EAN for the same employee is pending.
To check the expected completion date for the EAN, refer to the eAction Notice (EAN) Details page for the EAN. See the Related Help Topic.
To change an employee's job title:
1. On the Menu, click HR Administration > eAction NoticeHR Administration > eAction Notice.
The eAction Notice (EAN) SummaryeAction Notice (EAN) Summary page displays.
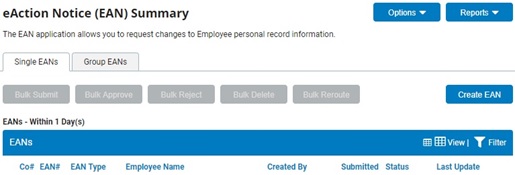
2. Click the Create EANCreate EAN button.

The Create New EAN(s)Create New EAN(s) window displays.

3. Select the employee whose job you want to change from the Employee drop-down box.
4. Select the Job Change EAN from the EAN type selection box and click the Create EANCreate EAN button.
The Job ChangeJob Change page for the employee you selected displays in a new window.
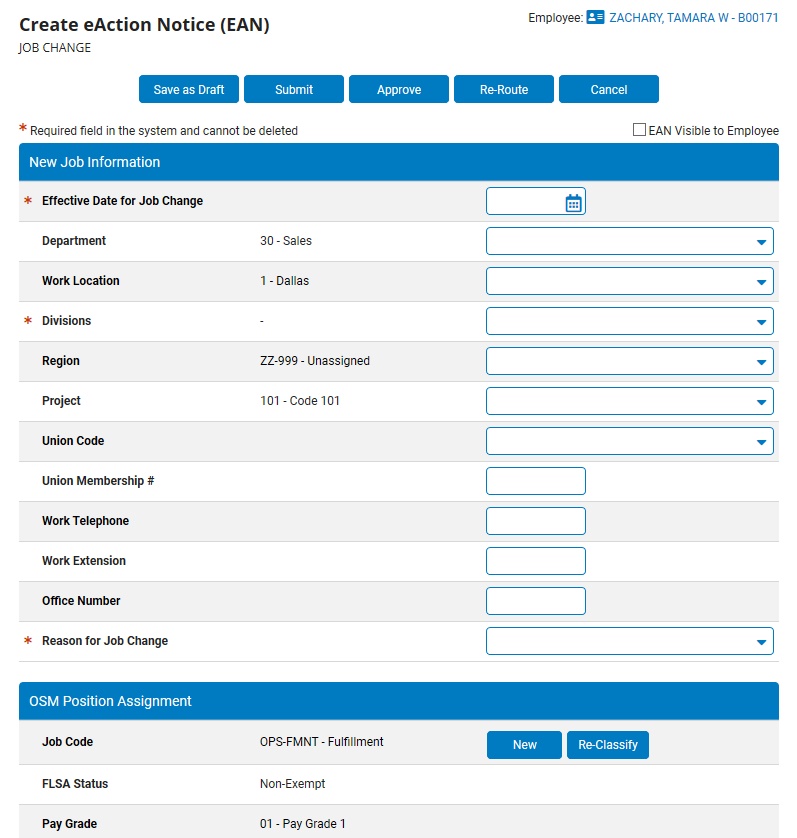
5. Designate whether or not the EAN will be visible to the employee from the Make EAN Visible to EmployeeMake EAN Visible to Employee check box.

Note: If you check the box, the employee may see that you have submitted a request to change their job.
6. Enter the date the employee's job change will be effective in the Effective Date for Job ChangeEffective Date for Job Change text box.

7. Select a reason for the job change from the Reason for Job ChangeReason for Job Change drop-down box.

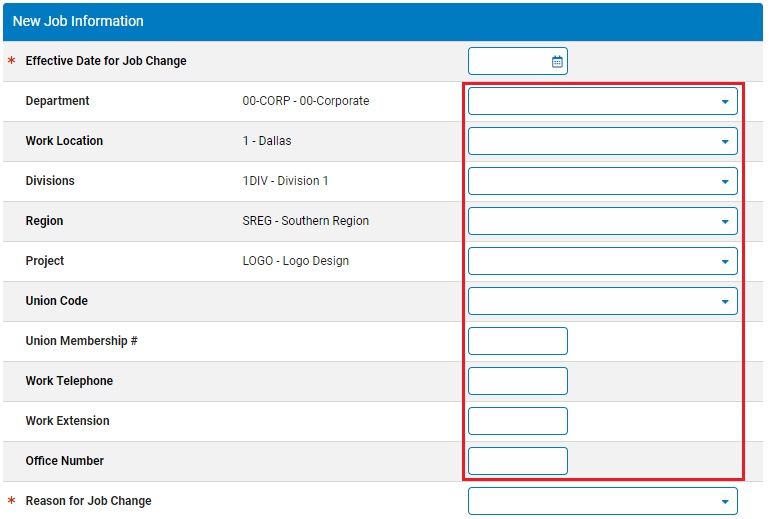
8. Complete the rest of the New Job InformationNew Job Information fields, as necessary.
9. Select the new job to which the employee will be assigned.
1. Click the NewNew button to select the employee's new position in your organization's OSM tree.

The Organizational Structure Management (OSM)Organizational Structure Management (OSM) page displays.
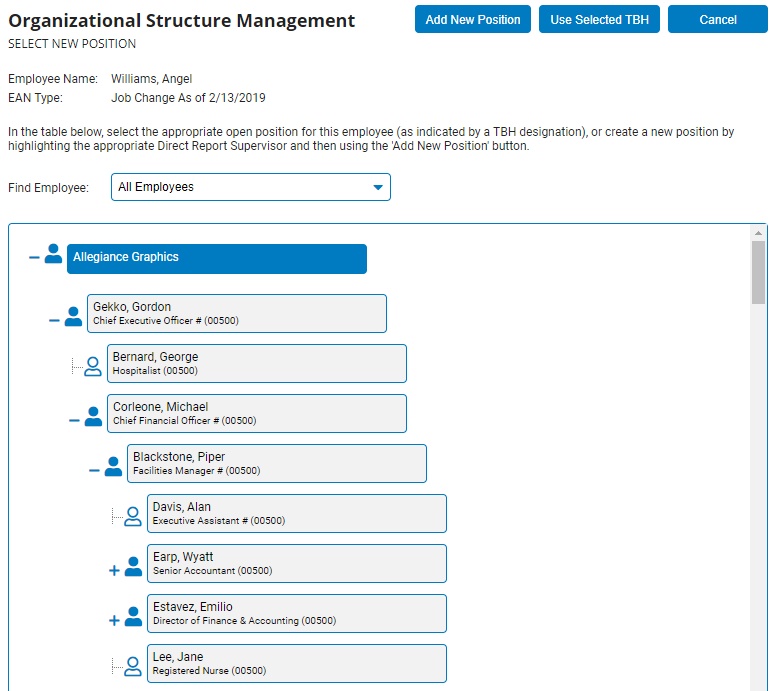
2. Select the position the employee will now fill from an open position in the list (marked in red)open position in the list (marked in red).

3. Click the Use Selected TBHUse Selected TBH button.

The employee will be assigned to the open position you selected from the OSM tree.
1. Click the NewNew button to select the employee's new position in your organization's OSM tree.
The Organizational Structure Management (OSM)Organizational Structure Management (OSM) page displays.
2. Select the employee's immediate supervisor from the OSM tree and then click the Add New PositionAdd New Position button.

The Add PositionAdd Position pop-up window will display.
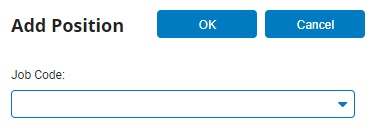
3. Select a job code for the new position from the Job CodeJob Code drop-down box and click the OKOK button.


The Confirm SupervisorsConfirm Supervisors page displays.
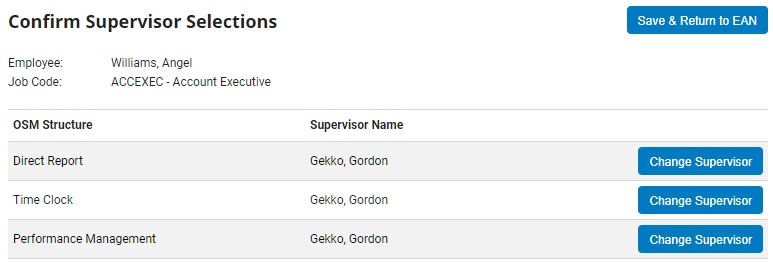
4. You may change the employee's direct report or time clock managers, if necessary.
Changing an Employee's Direct Report ManagerChanging an Employee's Direct Report Manager
1. Click the Change SupervisorChange Supervisor button.
![]()
The Organizational Structure Management (OSM) page will display.
2. Select the new direct report manager from the OSM tree.
The manager you selected will be highlighted.
3. Click the OKOK button.
![]()
The manager you selected will be assigned as the employee's direct report manager.
Changing an Employee's Time Clock ManagerChanging an Employee's Time Clock Manager
1. Click the Change SupervisorChange Supervisor button.
![]()
The Organizational Structure Management (OSM) page will display.
2. Select the new time clock manager from the OSM tree.
The manager you selected will be highlighted.
3. Click the OKOK button.
![]()
The manager you selected will be assigned as the employee's time clock manager.
5. Click the Save & Return to EANSave & Return to EAN button.
![]()
The employee will be assigned to the open position you selected from the OSM tree.
1. Click the Re-ClassifyRe-Classify button.

2. In the Re-Classify Existing Position pop-up, select a new job code to assign to the employee’s existing OSM position.
3. Click the OK button.
When the Job Change EAN is completed, the OSM utility will reclassify the current position occupied by the employee to the new Job Code. This will result in no change to the employee’s supervisory reporting structure.
10. Designate if you would like to have the employee's former position removed from the organizational tree or remain available for future employee assignment in the Remove Prior Position from OSMRemove Prior Position from OSM drop-down box.

Note: This option only appears after a new job position is selected for the employee to assume.
11. Enter the date the employee's pay rate change will be effective in the Effective Date for Pay ChangeEffective Date for Pay Change text box.

Note: If the effective date is in the past and some days have been paid incorrectly at the employee's old rate, you can click the Retroactive Pay CalculatorRetroactive Pay Calculator button (displayed at bottom of the Associated Payroll Changes section) to systematically calculate any wage adjustments that should be awarded to the employee to account for the retroactive pay rate change. See Related Help Topic: Calculating Retroactive Pay

12. Select a reason for the pay change from the Reason for Pay ChangeReason for Pay Change drop-down box.

13. Complete the rest of the Associated Payroll ChangesAssociated Payroll Changes fields, as necessary.
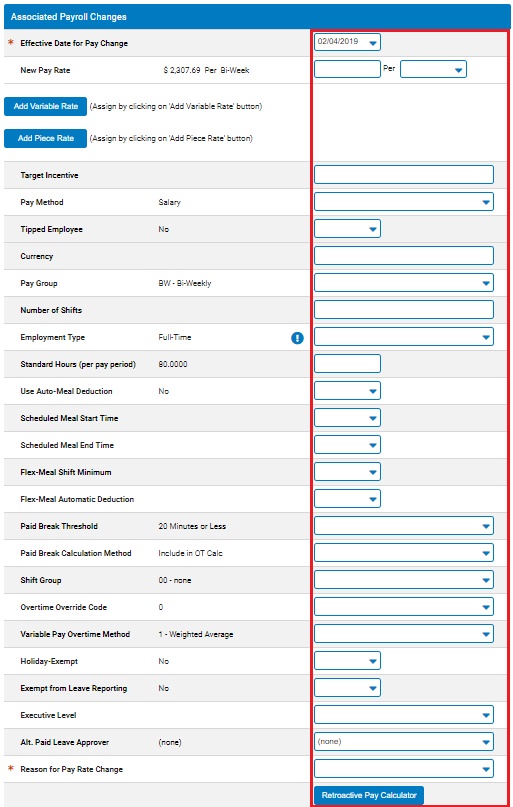
Note: If you select an FLSA Exempt job code, an Exempt from Leave Reporting field also appears.
14. If deemed necessary, use the Primary Benefit Salary field to supplement an employee's pay rate change with an immediate benefit salary adjustment (in lieu of having the benefit salary systematically recalculated upon the next scheduled interval).
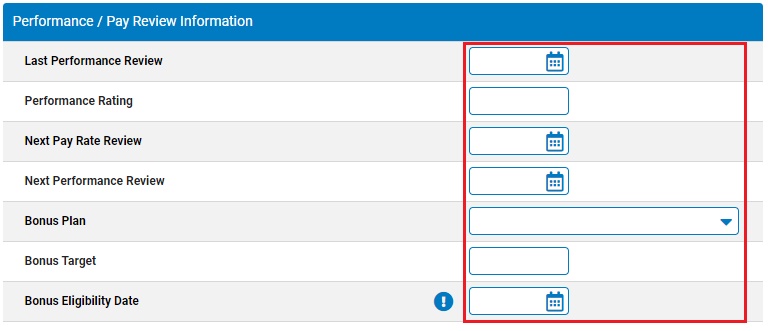
15. Complete the Performance/Pay Review InformationPerformance/Pay Review Information fields, as necessary.
16. Enter any notes related to the EAN in the EAN Notes text box.
17. If desired, click the Save as DraftSave as Draft button at the top or bottom of the page to keep the requested change in a drafted status so that it may be edited and submitted for completion at a later time.

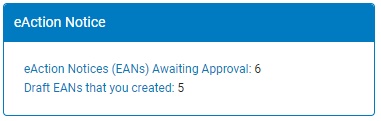
Note: When an EAN is put in a drafted status, a Draft EAN NoticeDraft EAN Notice with a link to the unsubmitted EAN is provided on the ExponentHR Dashboard.
18. After entering all necessary changes, click the Submit button to submit the EAN for approval.
Result: The EAN you just submitted is now visible on the eAction Notice (EAN) Summary page. The EAN must be approved by an appropriate person with rights in order for the change to be completed.
Note: If you need multiple managers to review this EAN before you submit it, you may re-route the EAN. See Related Help Topics for more information.
Related Help Topics:
Changing an Employee's Supervisor
Changing Employment Information
Checking the Expected Completion of an EAN
Demonstration
For additional information on this topic, click on the link below to view a demonstration.
Job Change EAN